How to Run a Test Case Locally
Subject7 Player Installation
1- In order to test and debug a test case you have written, click Download Local Player button under your username.
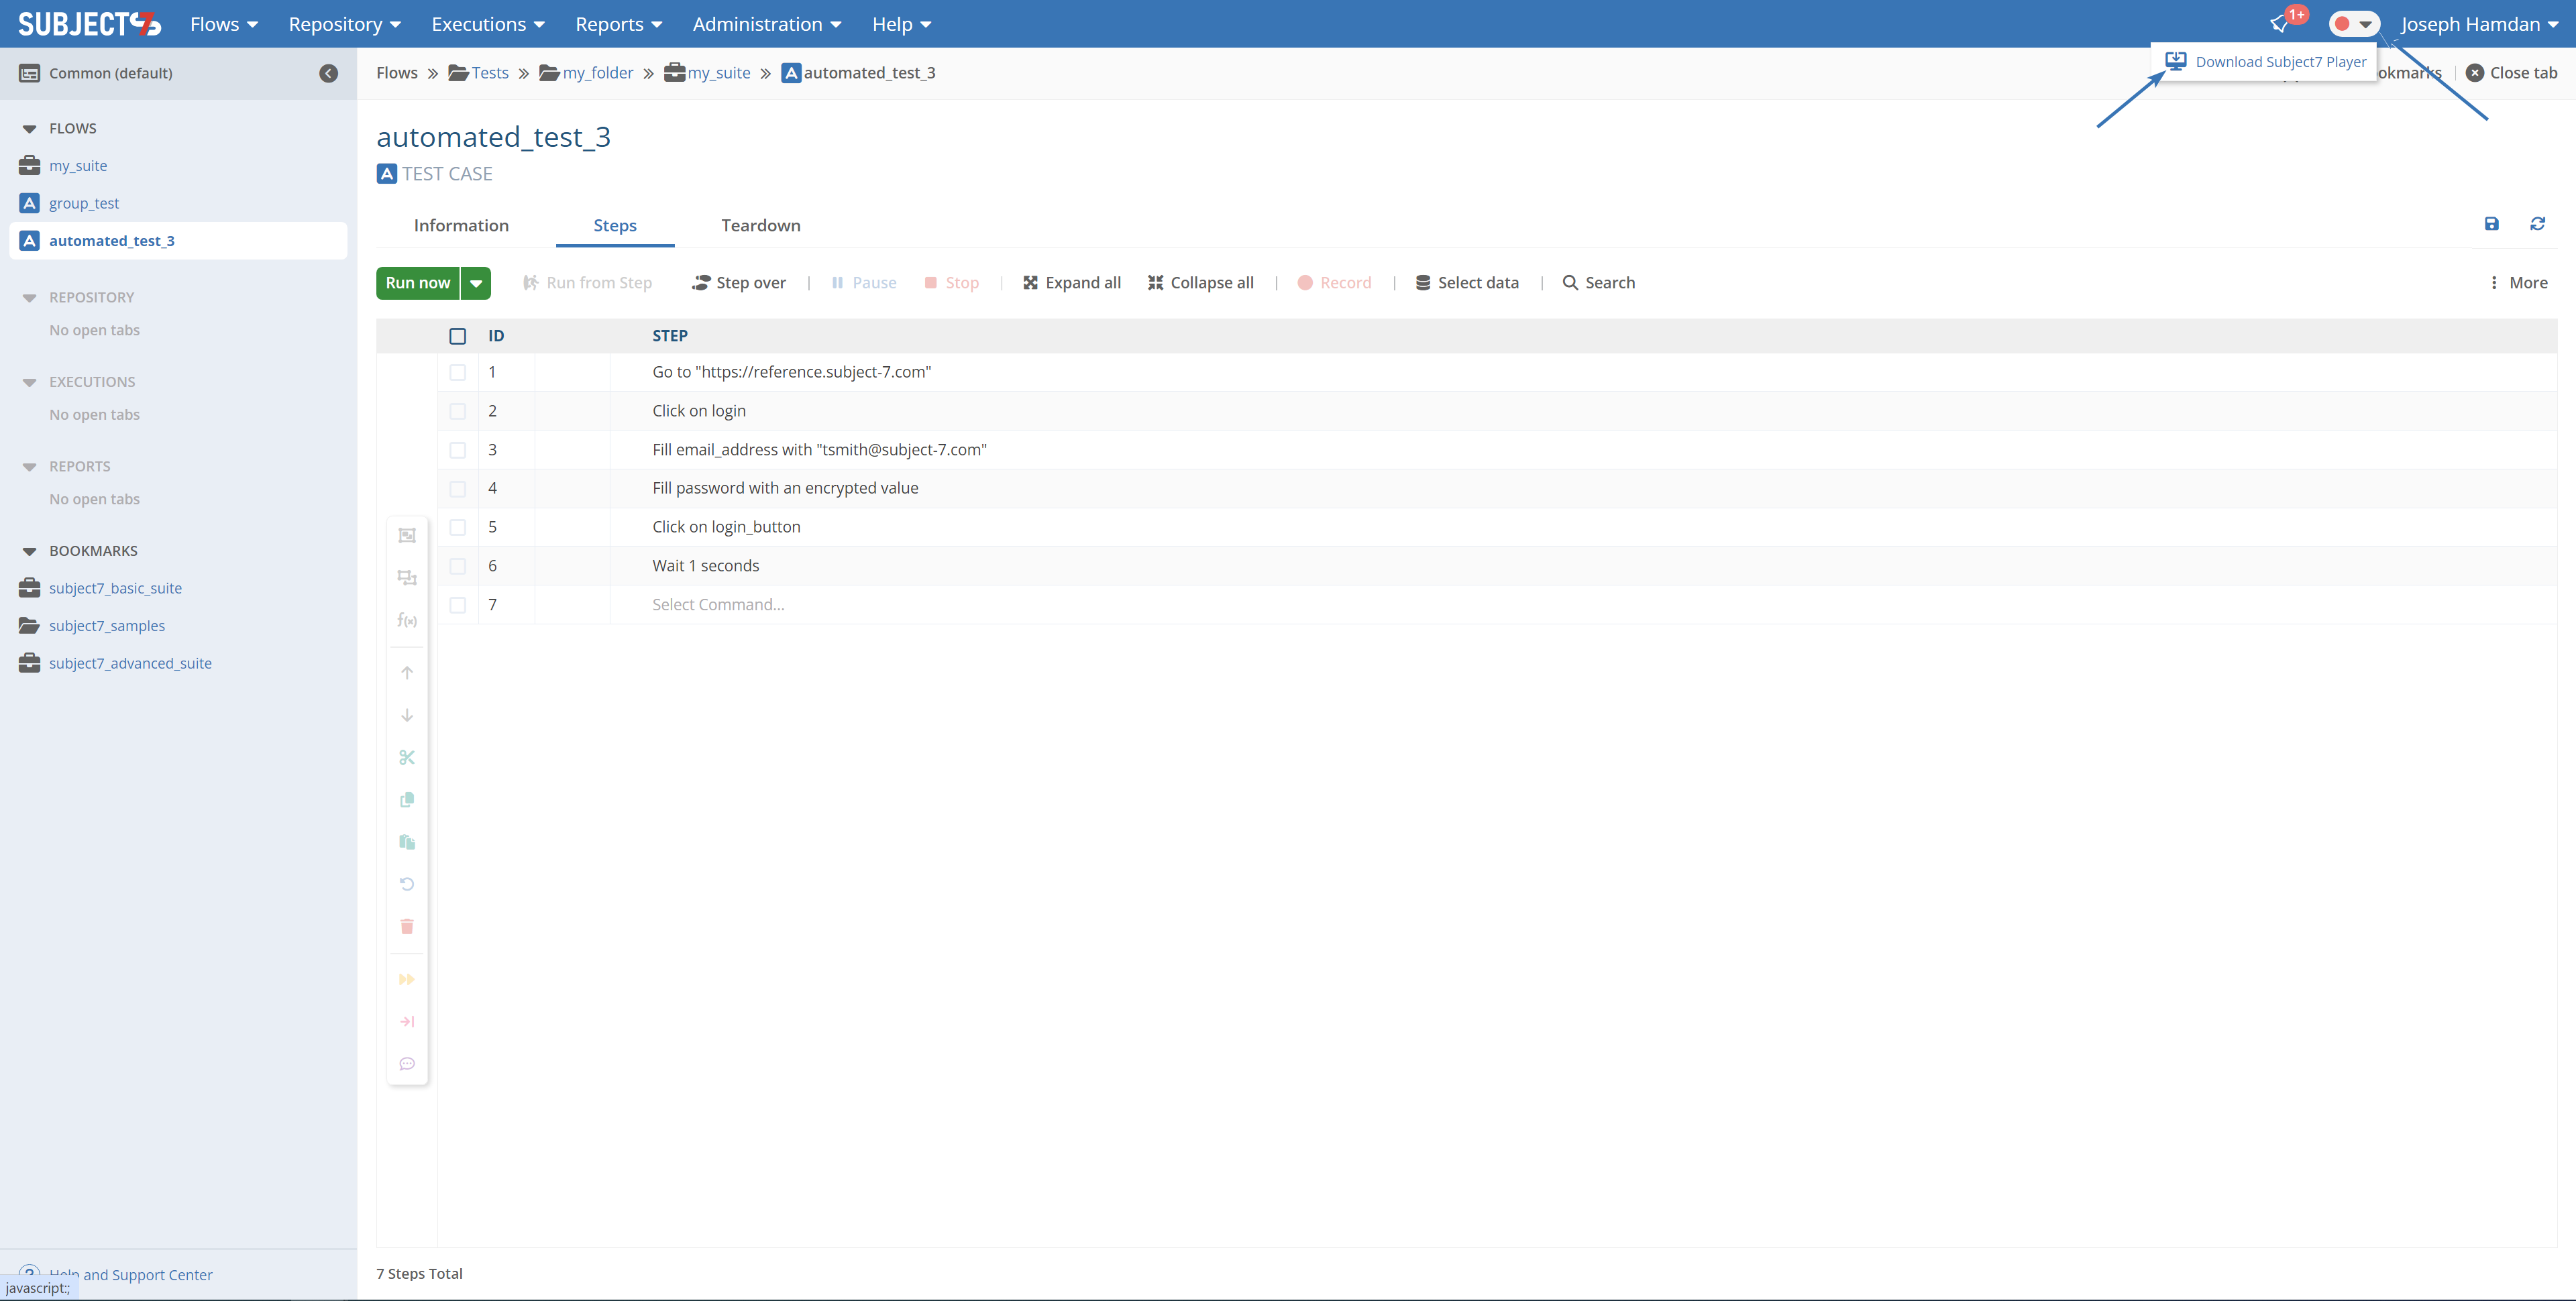 Alternatively, you can directly navigate to the test case you want to run and click Run now.

2- Once the executable file is downloaded, double click on it to set up the application.

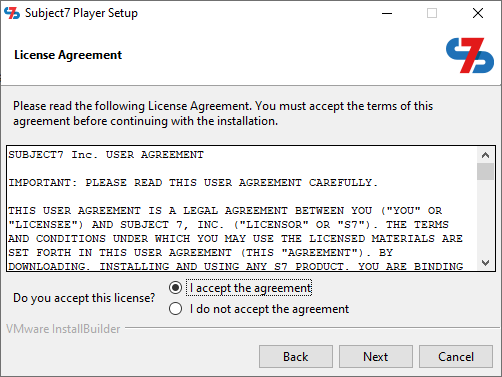
3- Click Next on the initial screen and accept the licensing agreement.
4- Click Next and select the installation directory.

5- For SaaS (https://platform.subject-7.com), you can click Next. If Subject7 is installed on an on-premise server or private cloud, click On-Premise Installation checkbox to enable it and include your Subject7 platform’s URL and port (please pay attention to change this to the correct URL) and click Next.
*NOTE: The port entered here must match what you have in User Execution Preferences and must be a free port (default is 10000).
6- Click Next and the installer will install Subject7 Player on your machine.

7- Once the installation is complete, click Finish.
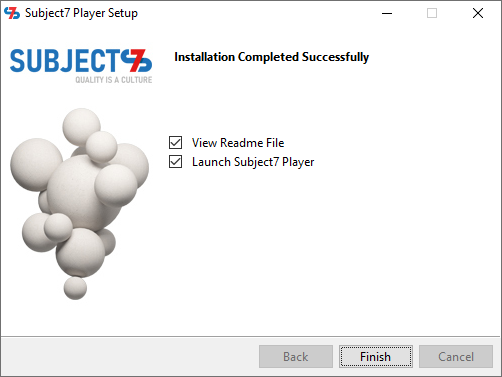
8- If you unchecked "Launch Subject7 Player" on the previous screen, double click on the shortcut on your desktop to start the player.

9- Once the application starts, the indicator on Subject7’s website will turn to green and you can run your test cases locally now. If it does not change to green, refresh your page or make sure that the application is running.
10- To close the connection, simply close the application from your hidden icons menu on the bottom right corner of your screen. You can do so by right clicking on it and selecting Exit.
11- For future use, simply open Subject7 Player application and switch back to Subject7’s website to get connected. To close the connection, simply close the application from your hidden icons menu on the bottom right corner of your screen. You can do so by right clicking on it and selecting Exit.
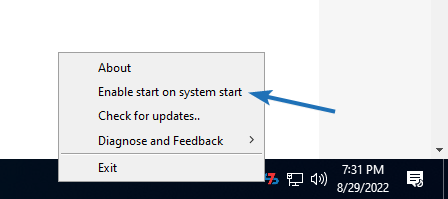
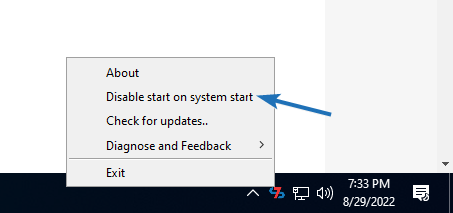
12- For future use, you can enable/disable starting Subject7 player when the operating system starts. To do so, right click on Subject7's icon in the hidden icons menu and click "Enable start on system start". The next time you restart your device, you will notice the Subject7 Player running automatically. To disable this, right click on Subject7's icon in the hidden icons menu and click "Disable start on system start".
*Enabling Subject7 Player automatic start:
*Disabling Subject7 Player automatic start:
Local Run (Local Execution)
1- Click Play to run your test case.
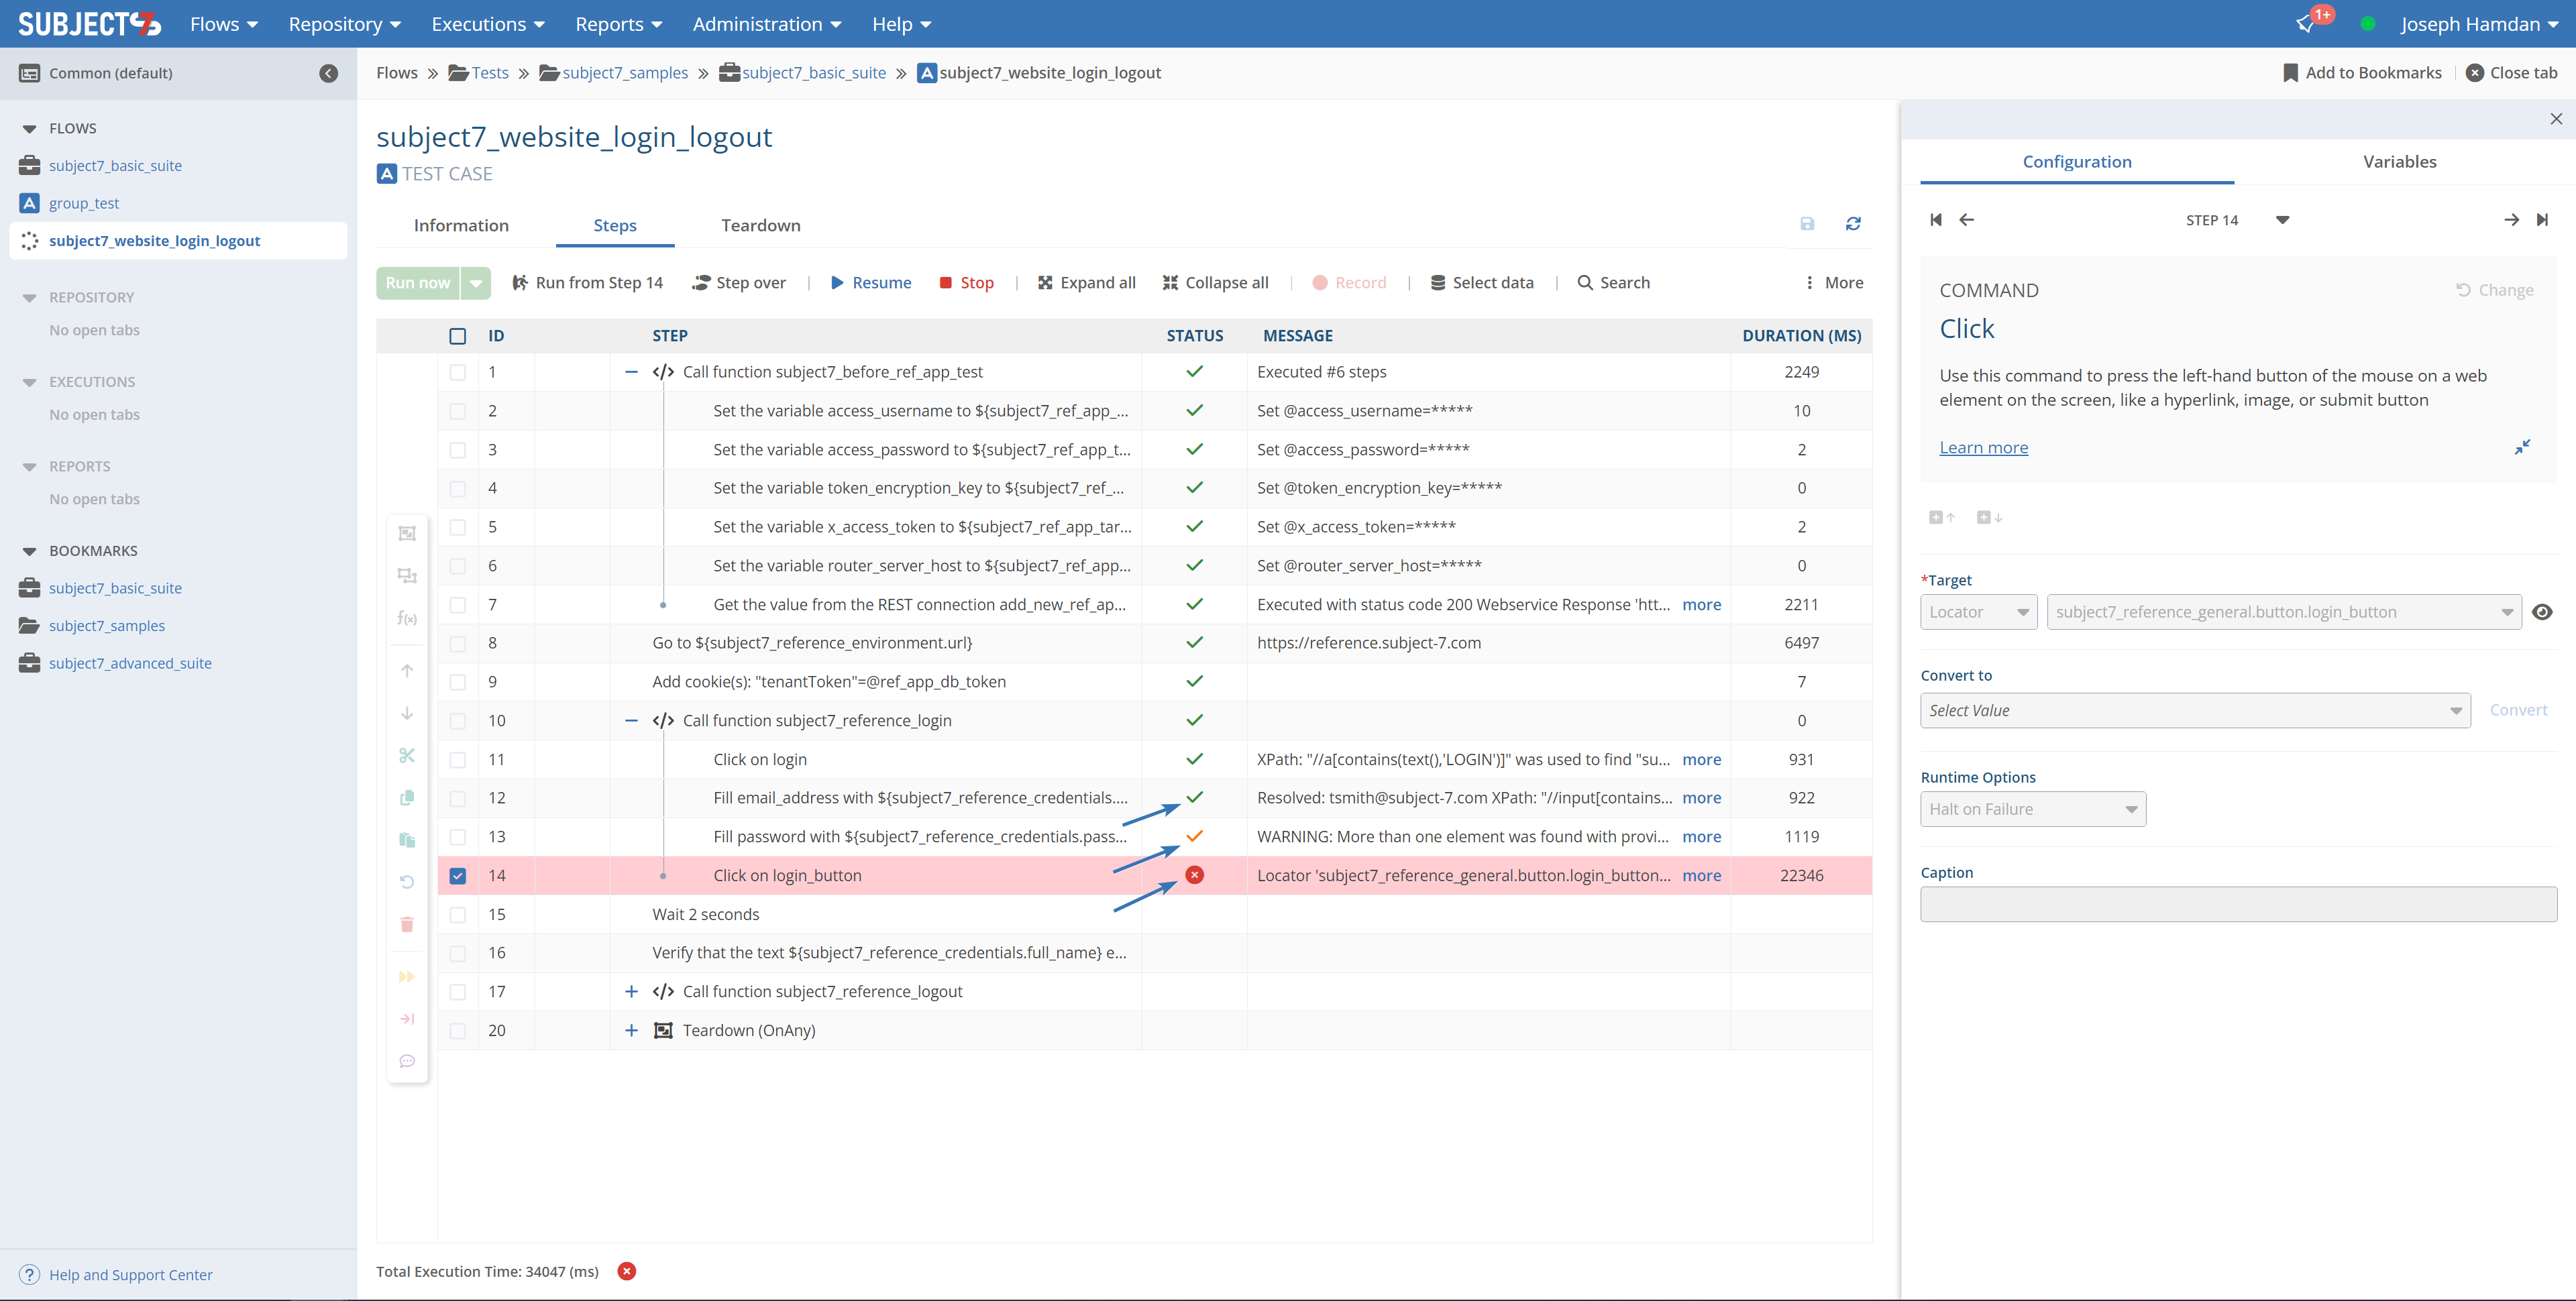
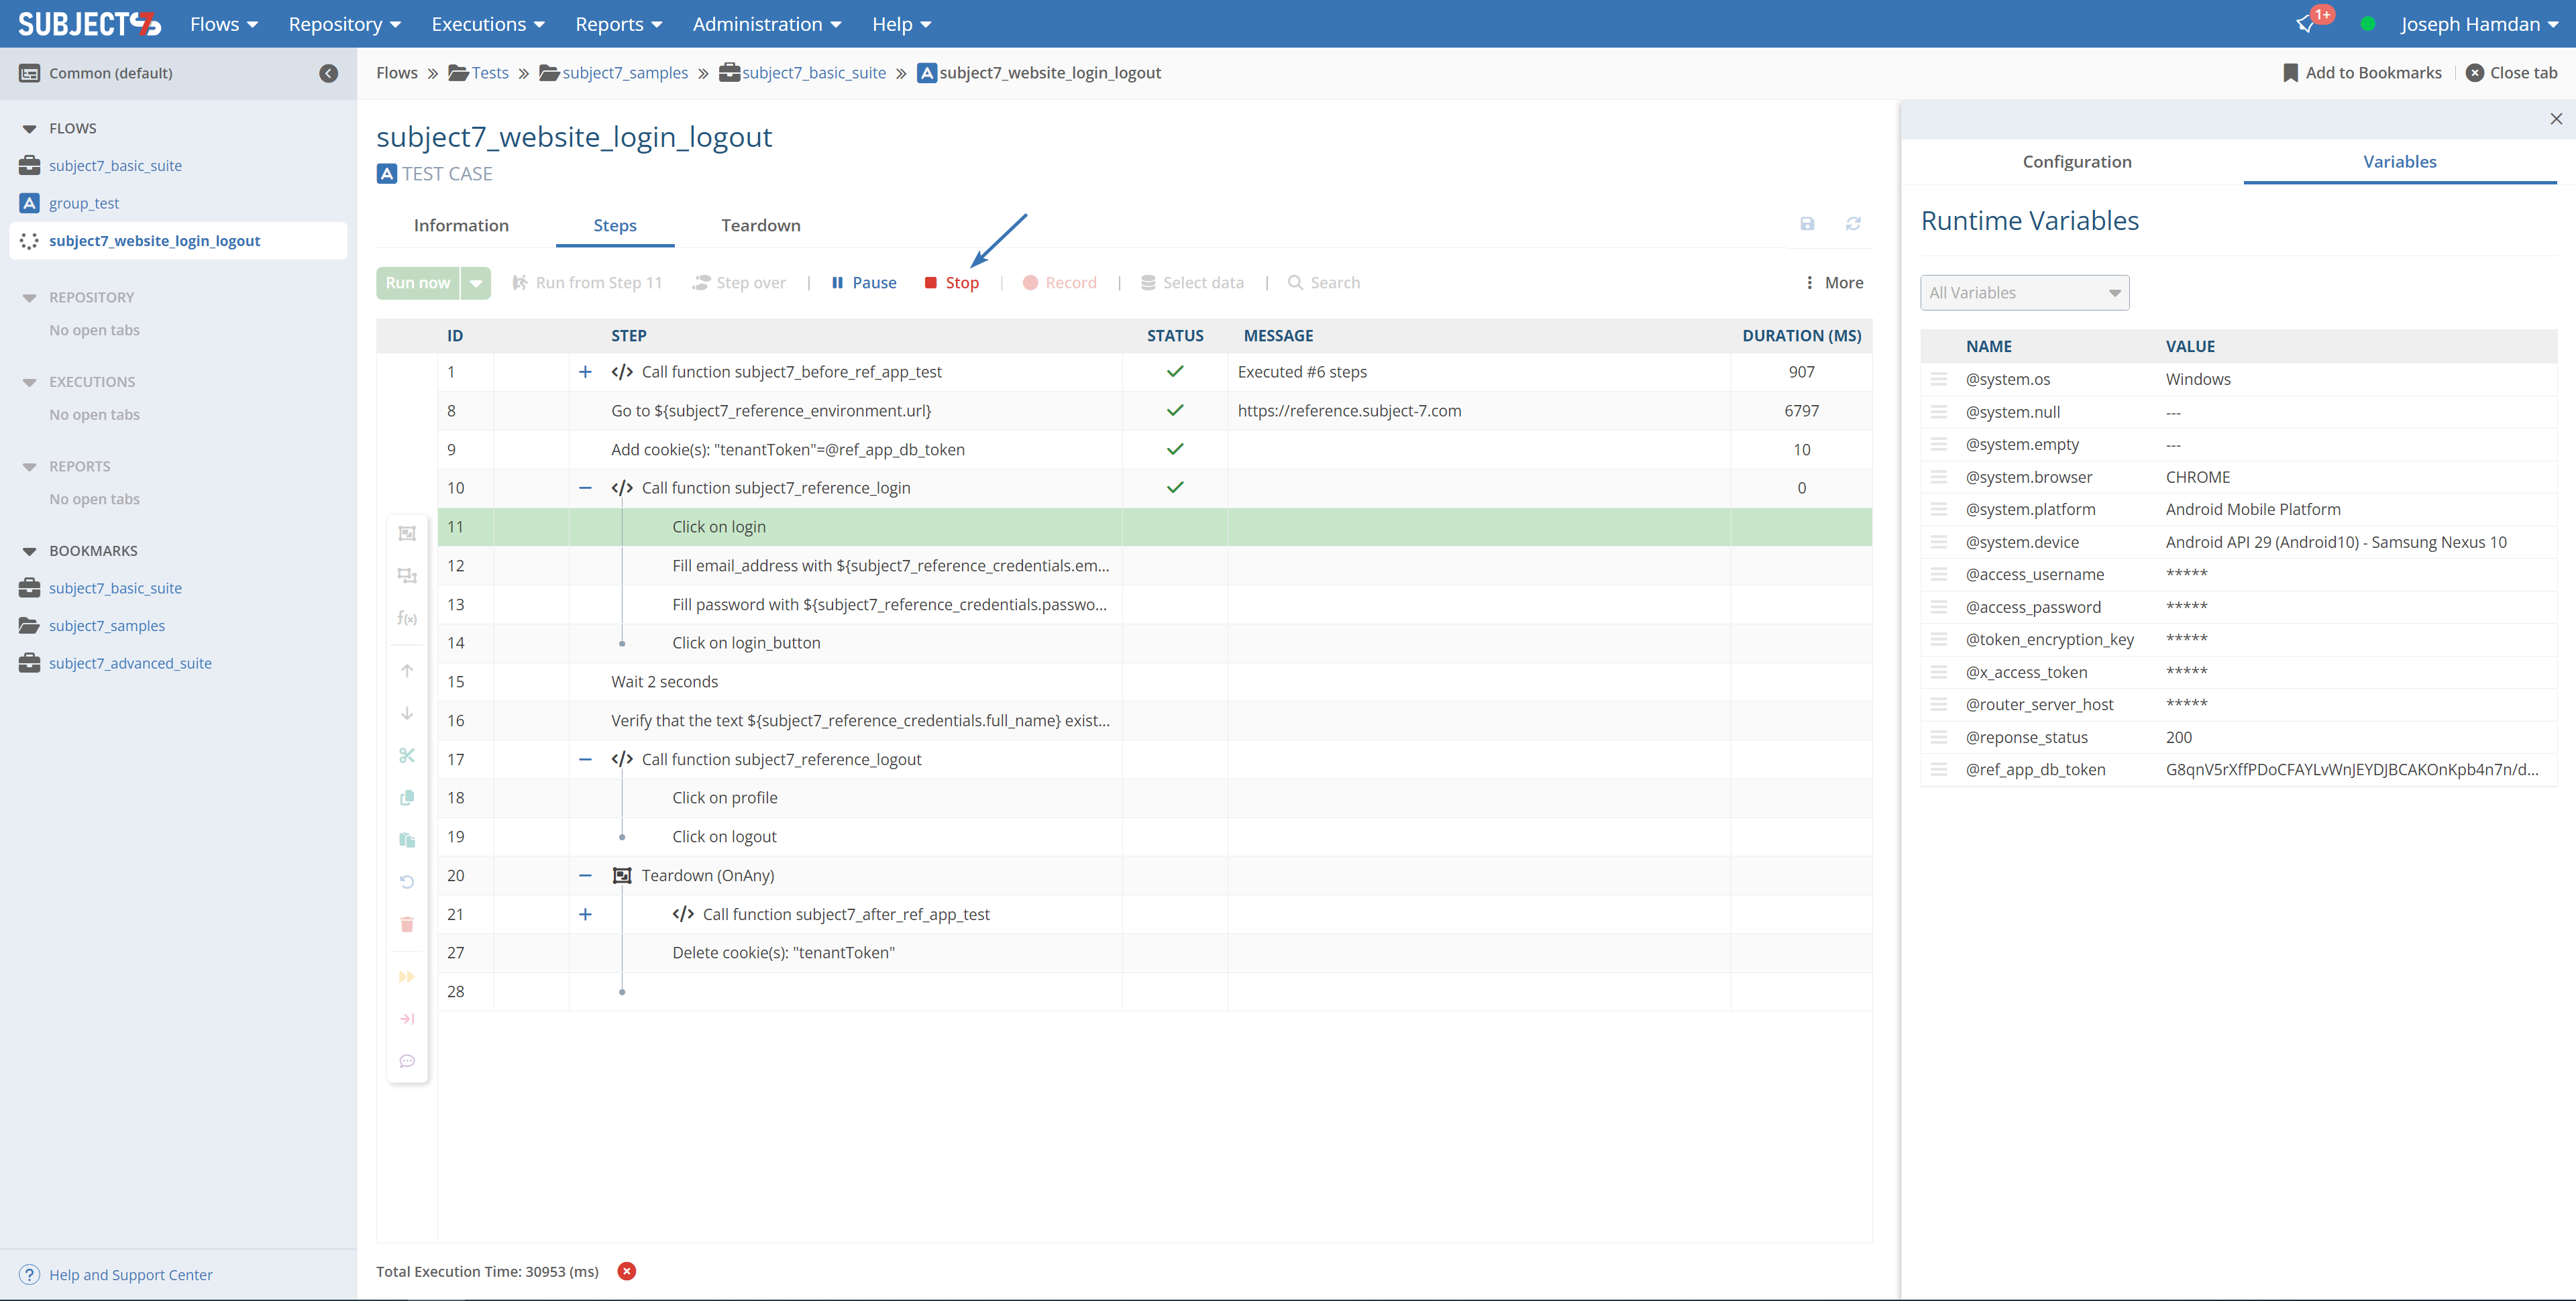
2- As the Test Case is running, it will update the status of each step in the Status field shown below by providing (pass, fail, or fail_skip). The overall status is shown in the bottom left corner of the screen in addition to the execution time.
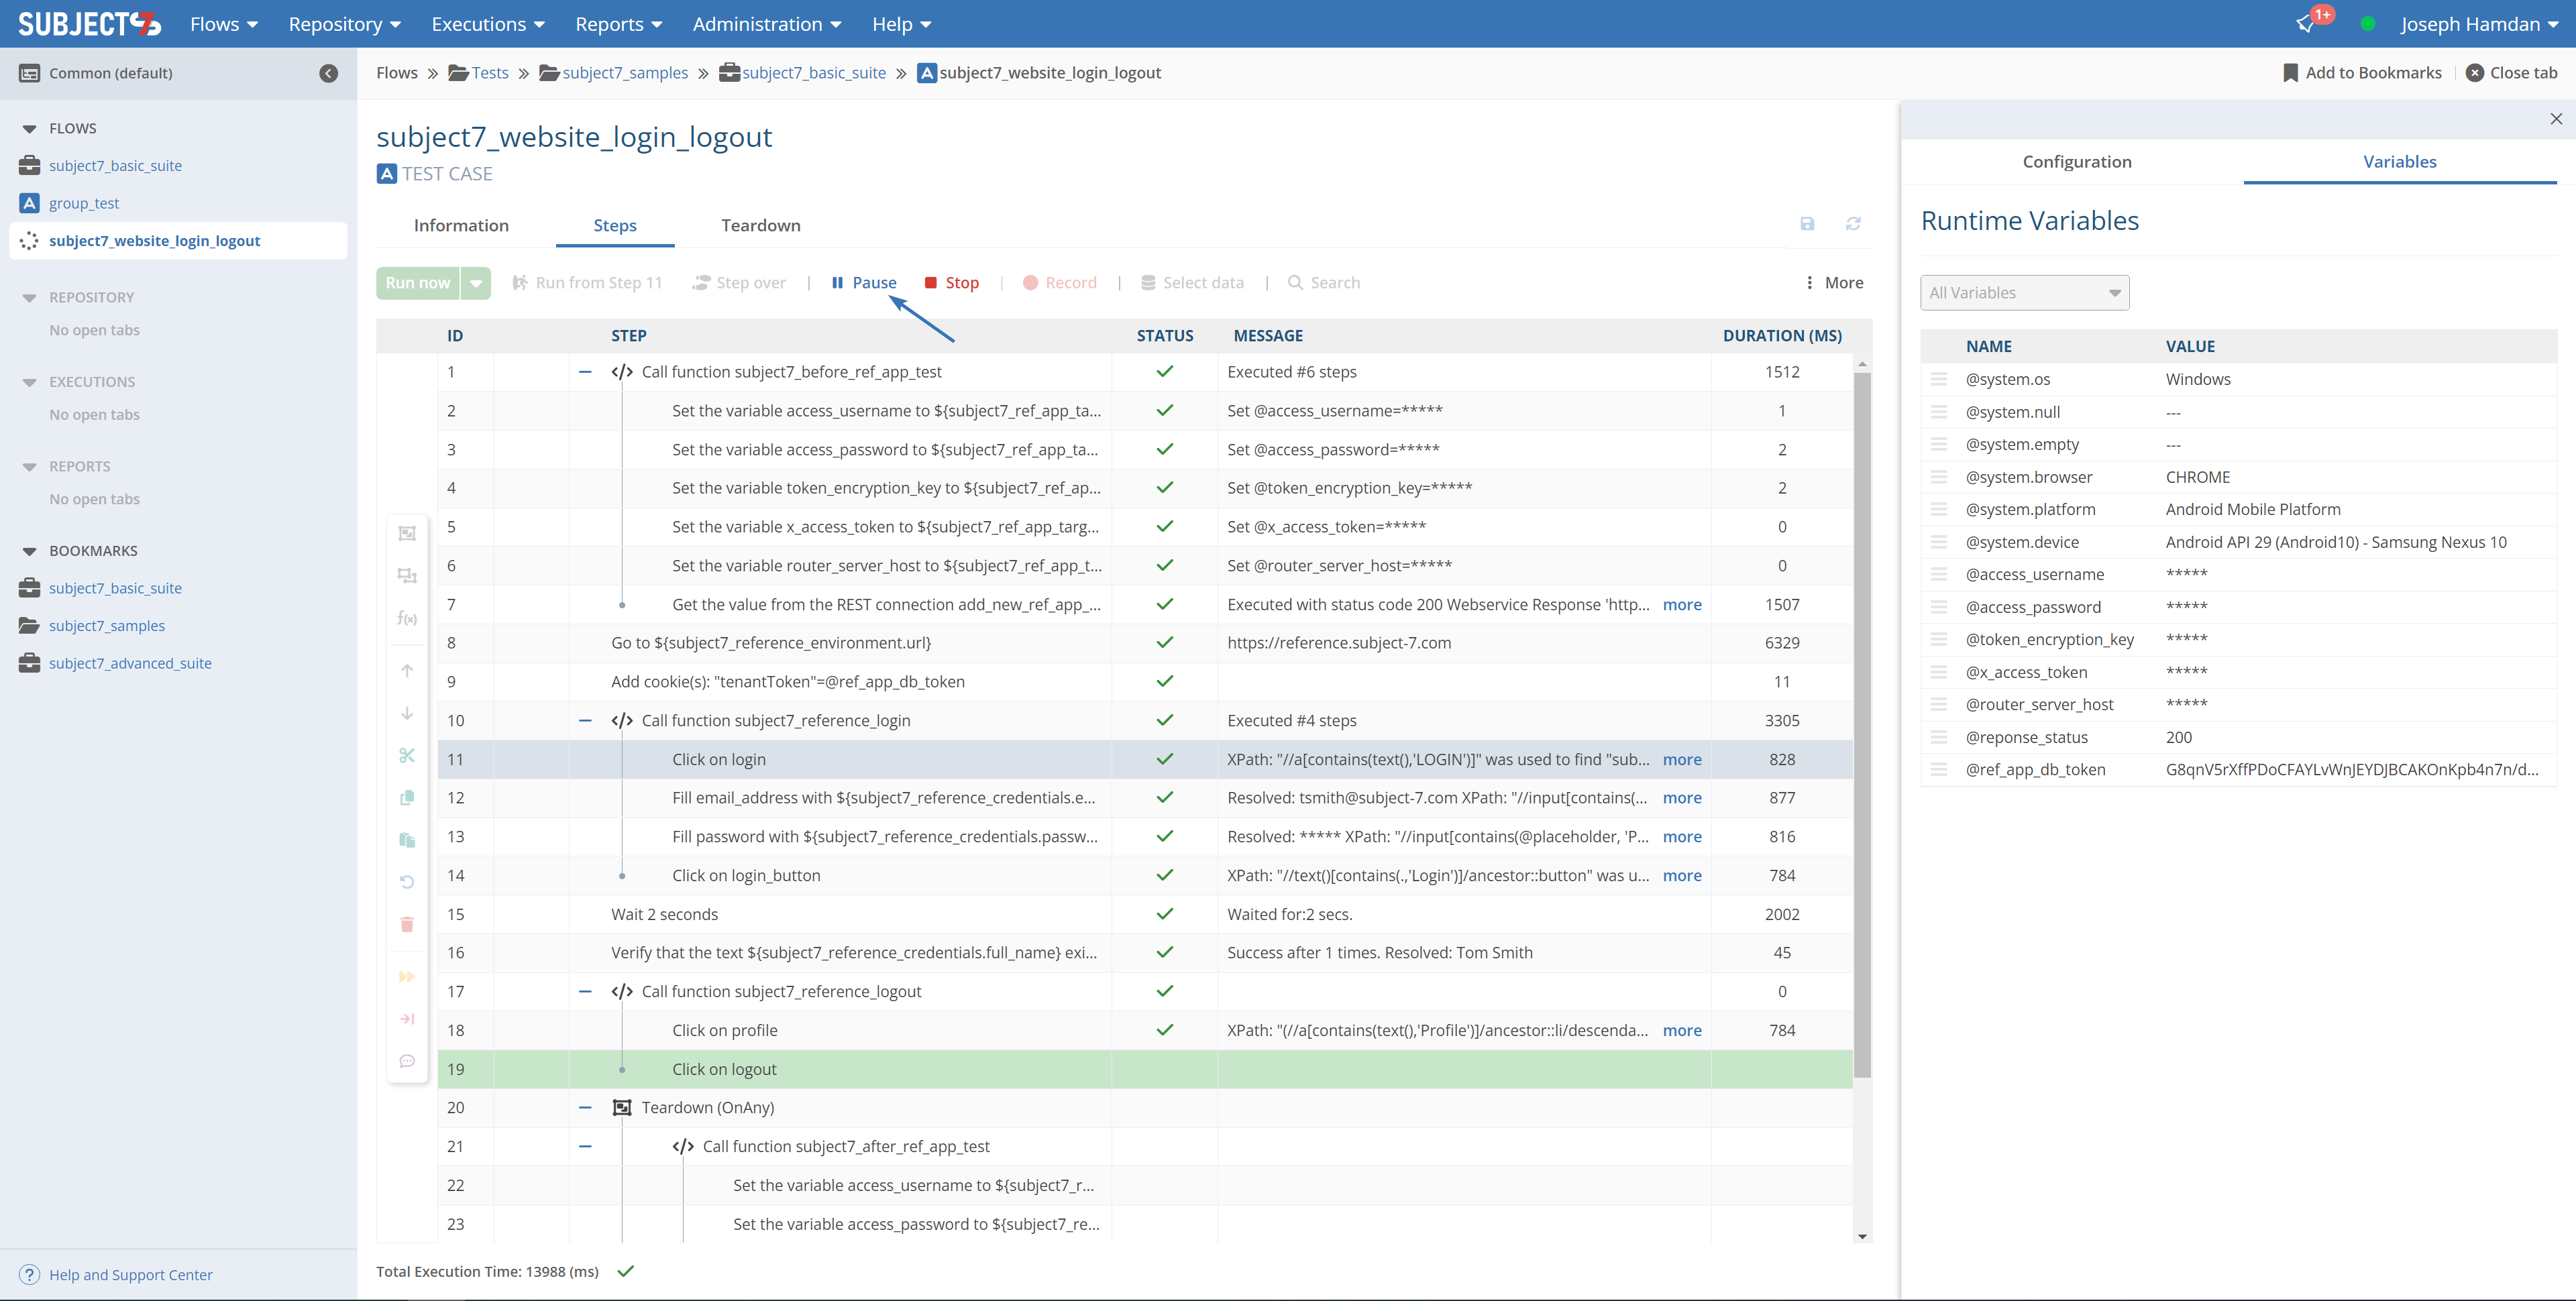
 3- When a test case is run locally, a watch window (Variables) will appear on the right side of the screen that shows all of the variables and their values as test case is executing. The following is a list of system variables:
| Variable | Definition |
|---|---|
| @system.browser | shows the default browser that was set. |
| @system.platform | shows the default mobile platform that was set. |
| @system.null | facilitate comparing variables with a null value |
| @system.empty | facilitate comparing variables with an empty string |
| @system.os | shows the operating system where the local run is performed (Windows, macOS, Linux). |
| @system.undefined | If a variable is not defined or initialized, its value is “undefined” |
You can drag and drop any variable on the watch window to your convenience as long as the test case execution is paused/finished. The below is an example that shows dragging and dropping variables.
4- As your test case is running, the Run now button will be greyed out while the pause and stop buttons will active. In the middle of execution of a test case, you can click the pause button to pause the execution. Now, you can click on the Resume button anytime you like to resume the execution. While test case is paused, you can make changes to the test case, save your changes, and resume the execution.
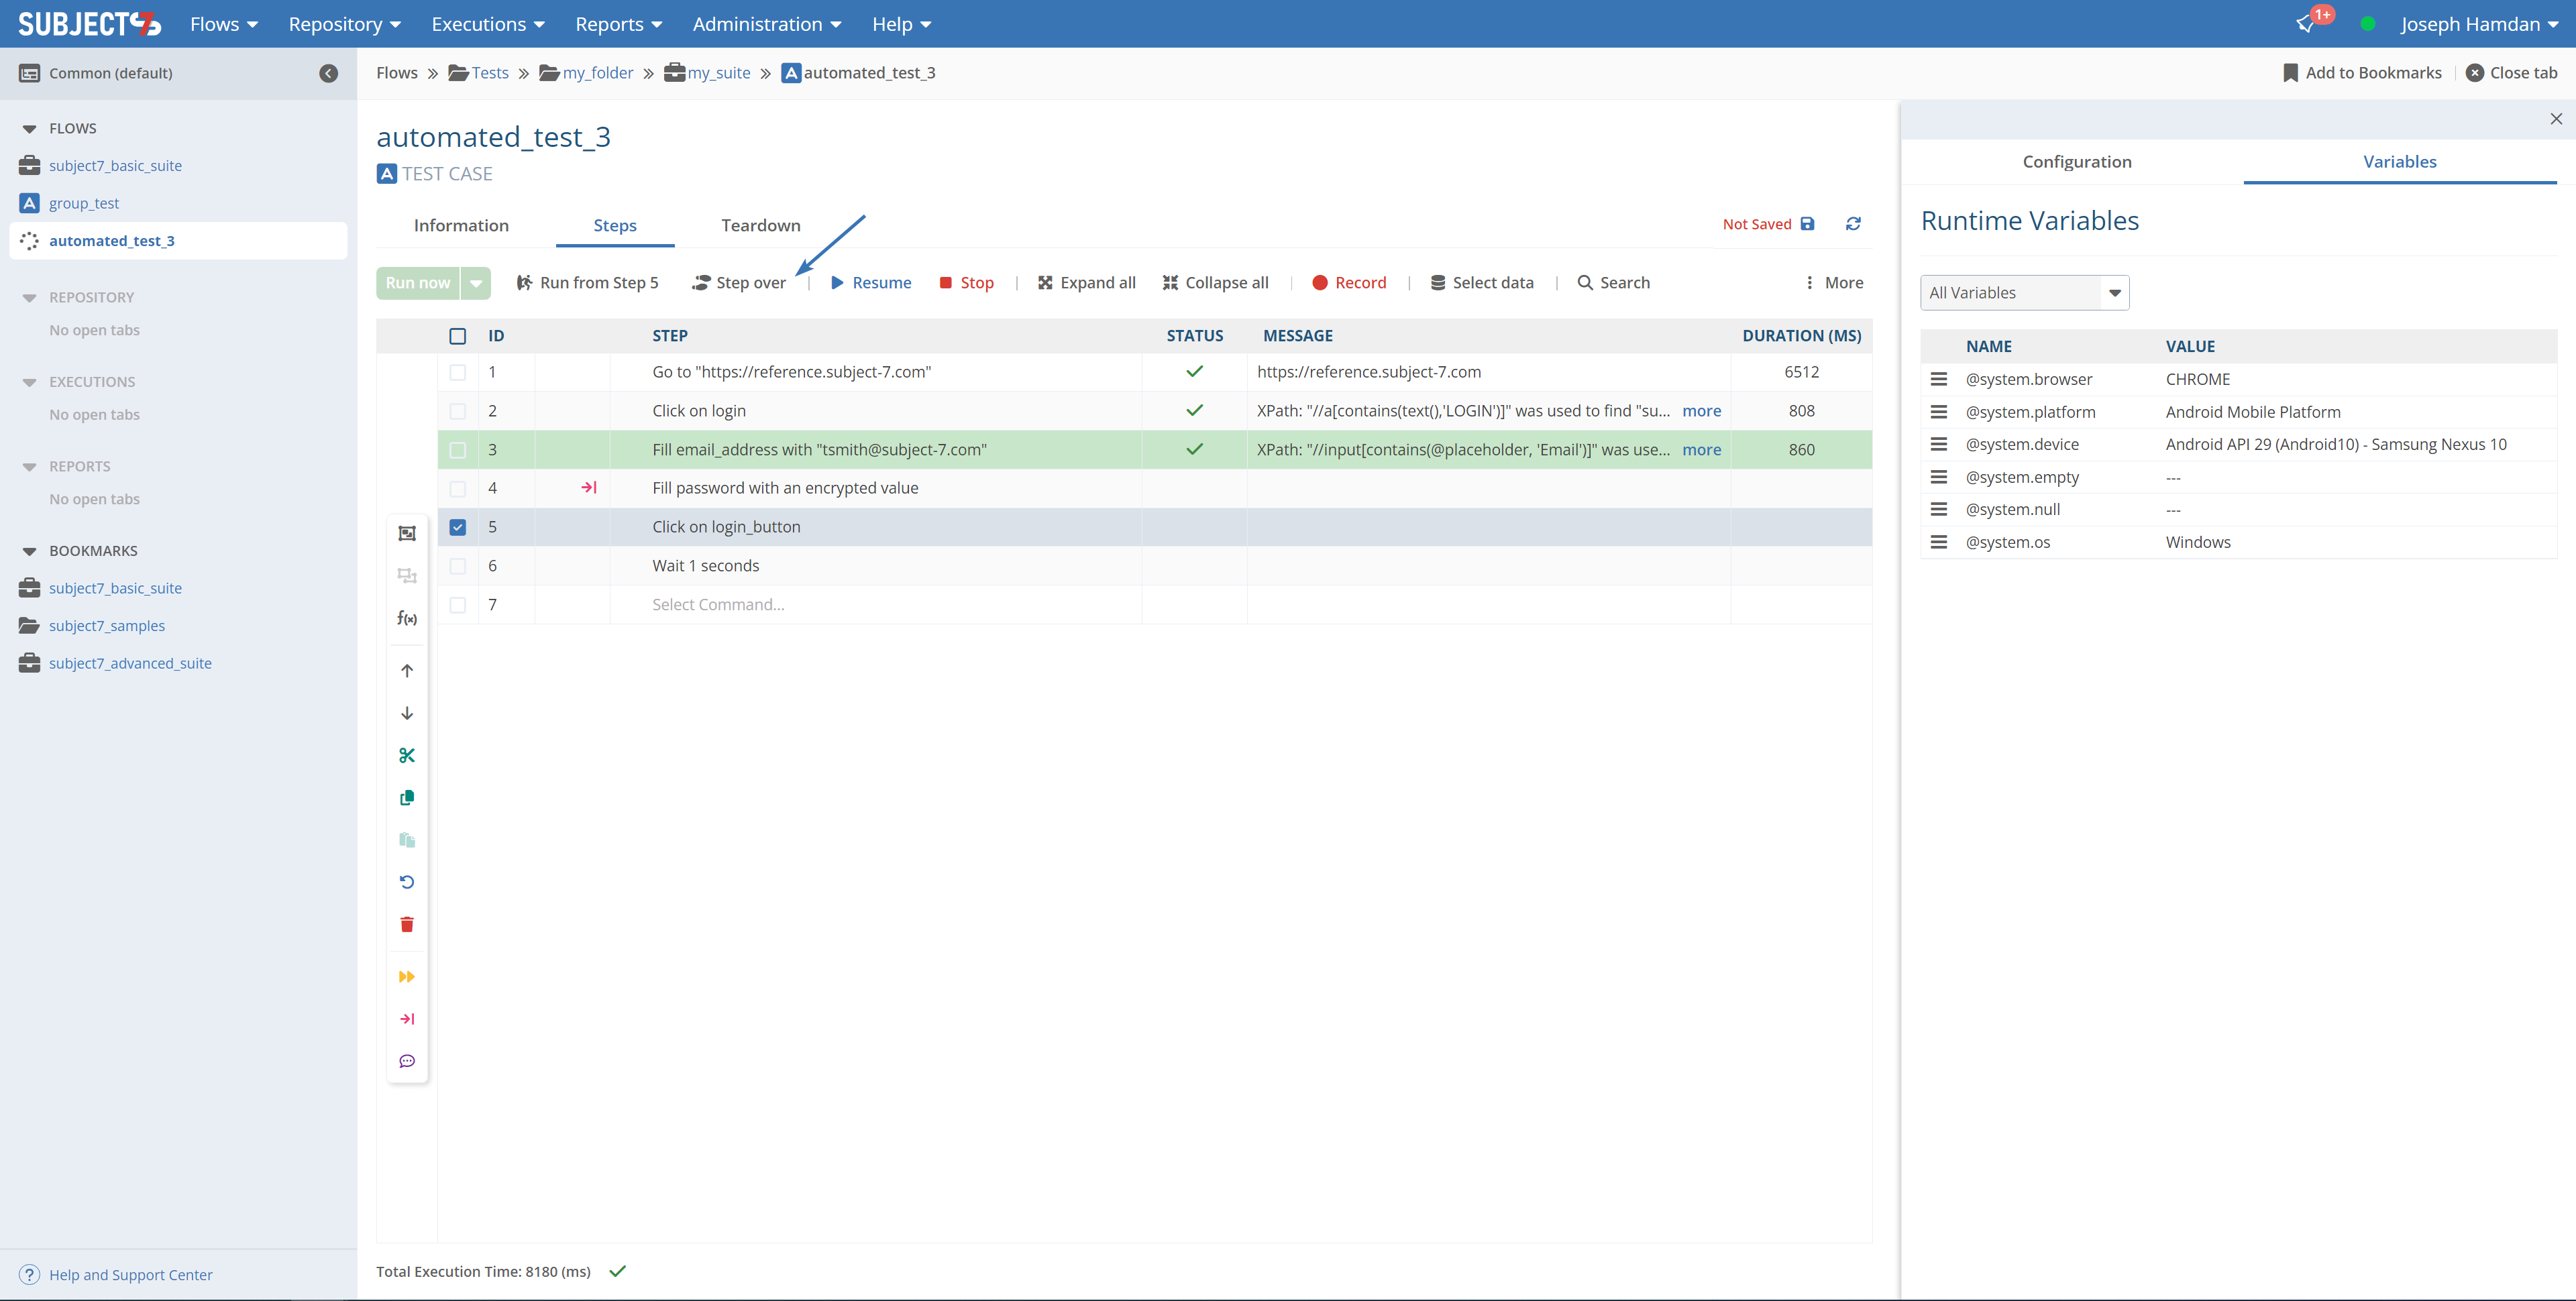
 5- When in pause status or when the test case has been executed to the end, you can click on the checkbox of a particular step or the caption to control the step step you would like to re-execute from (the step will be highlighted in grey), then click Run from Step # as shown below.
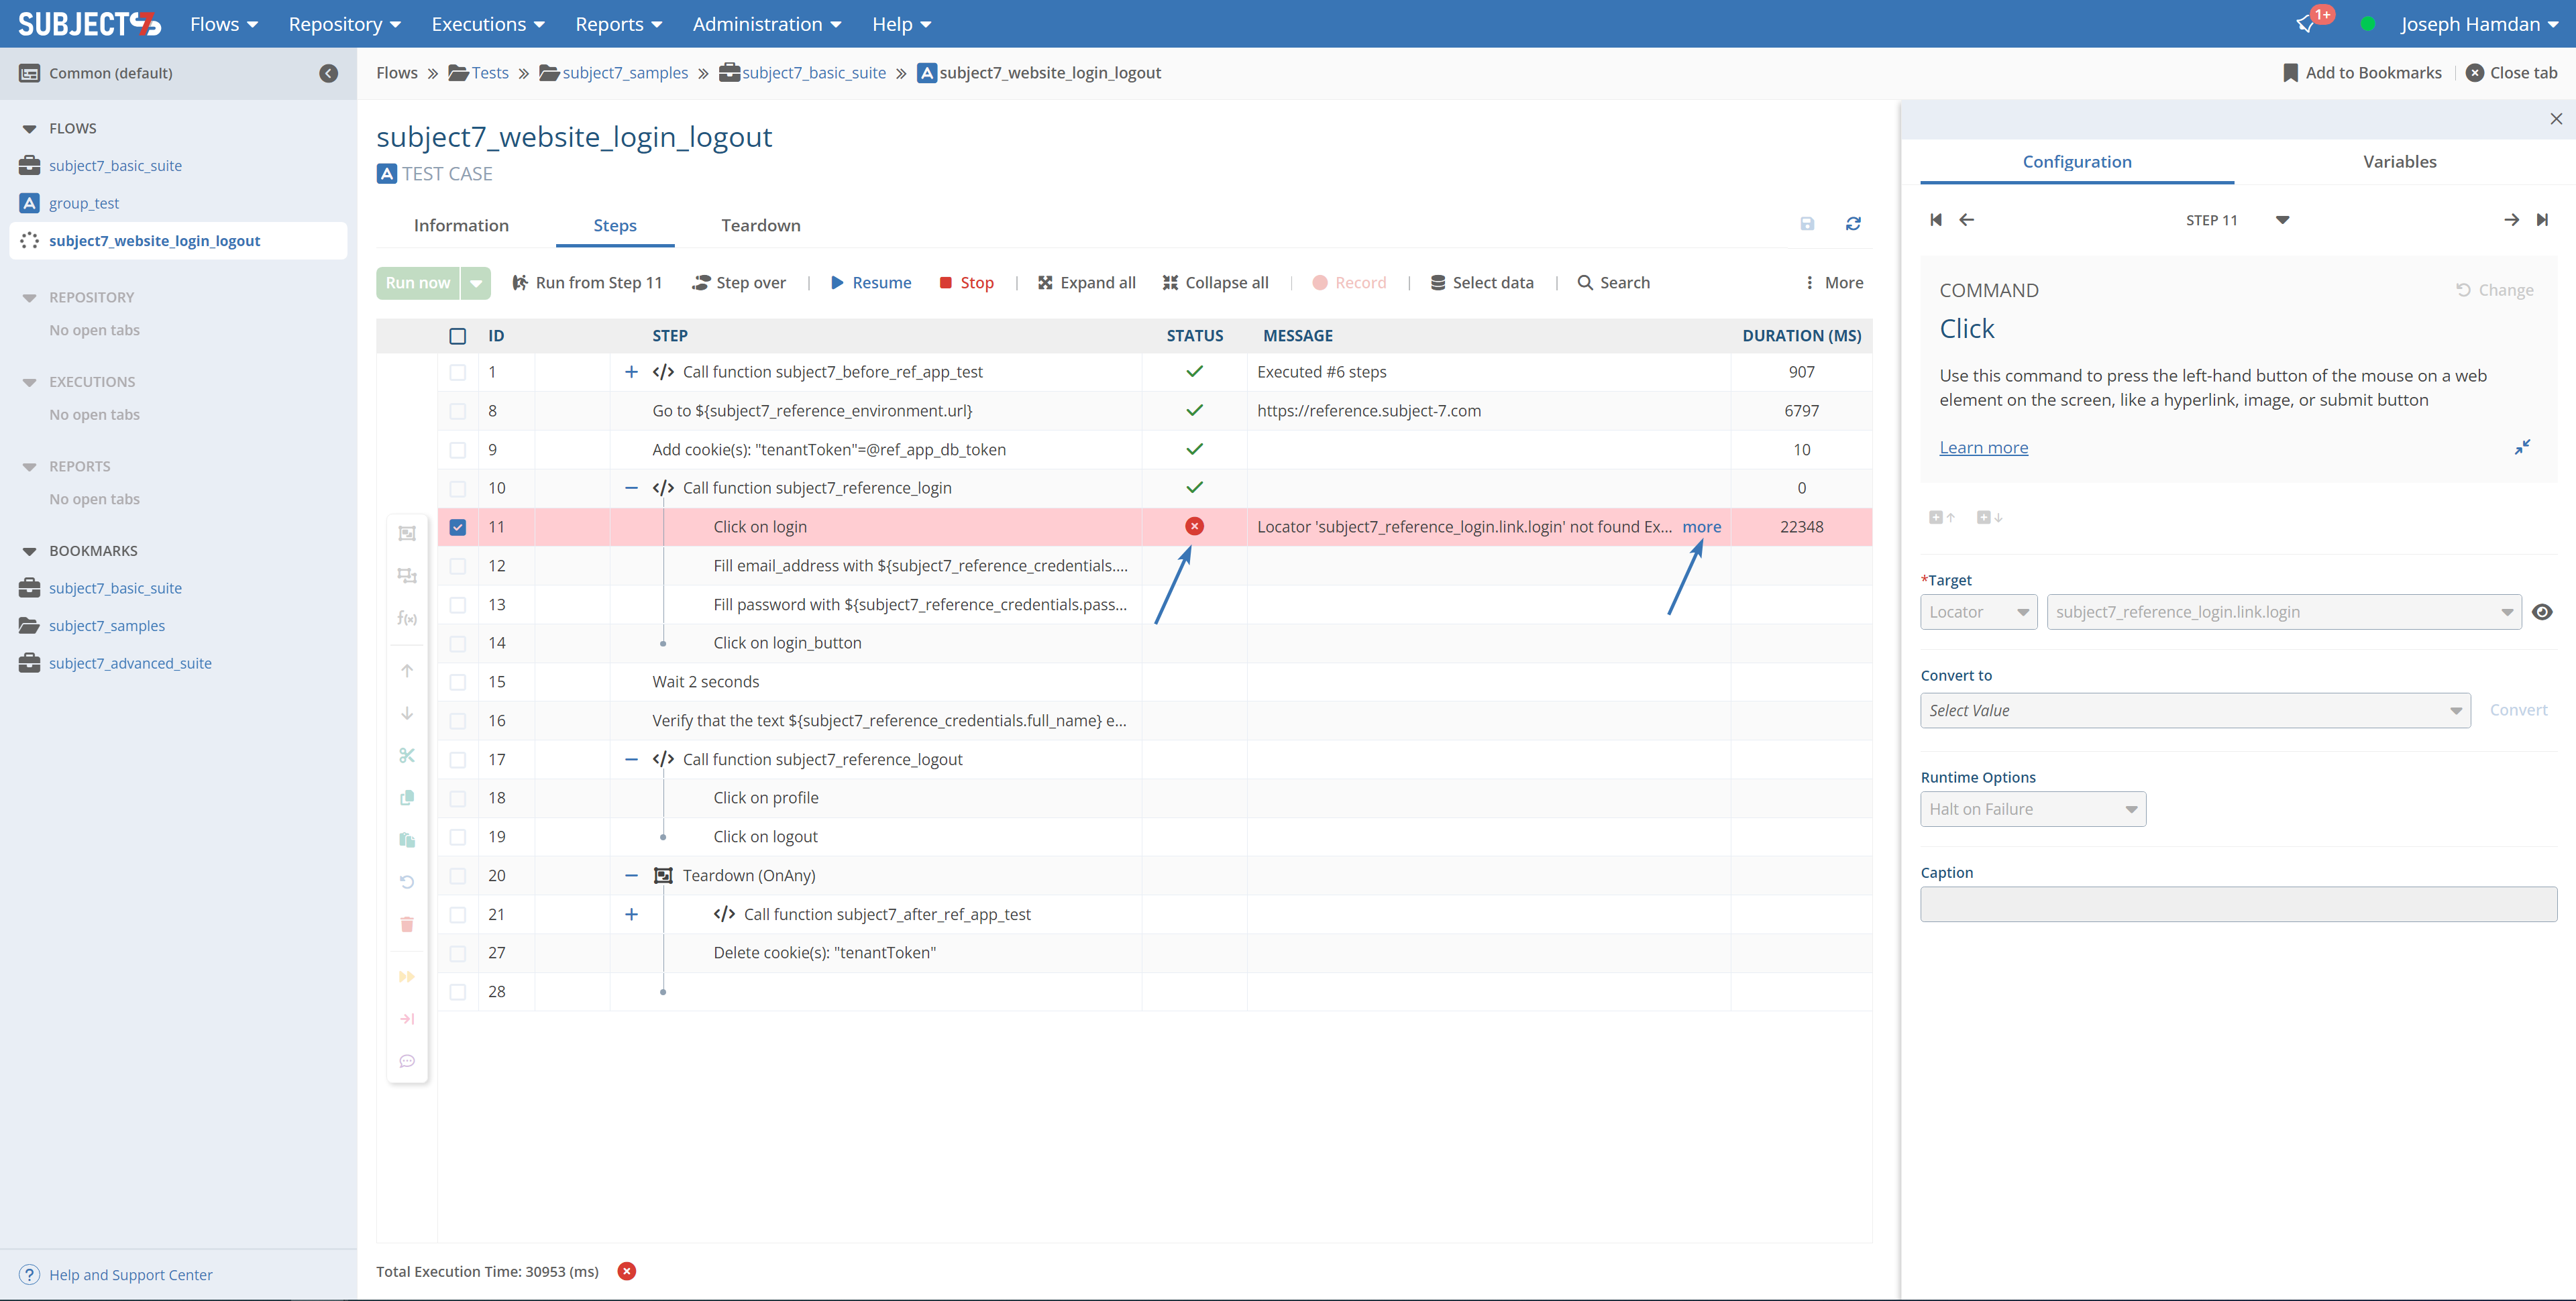
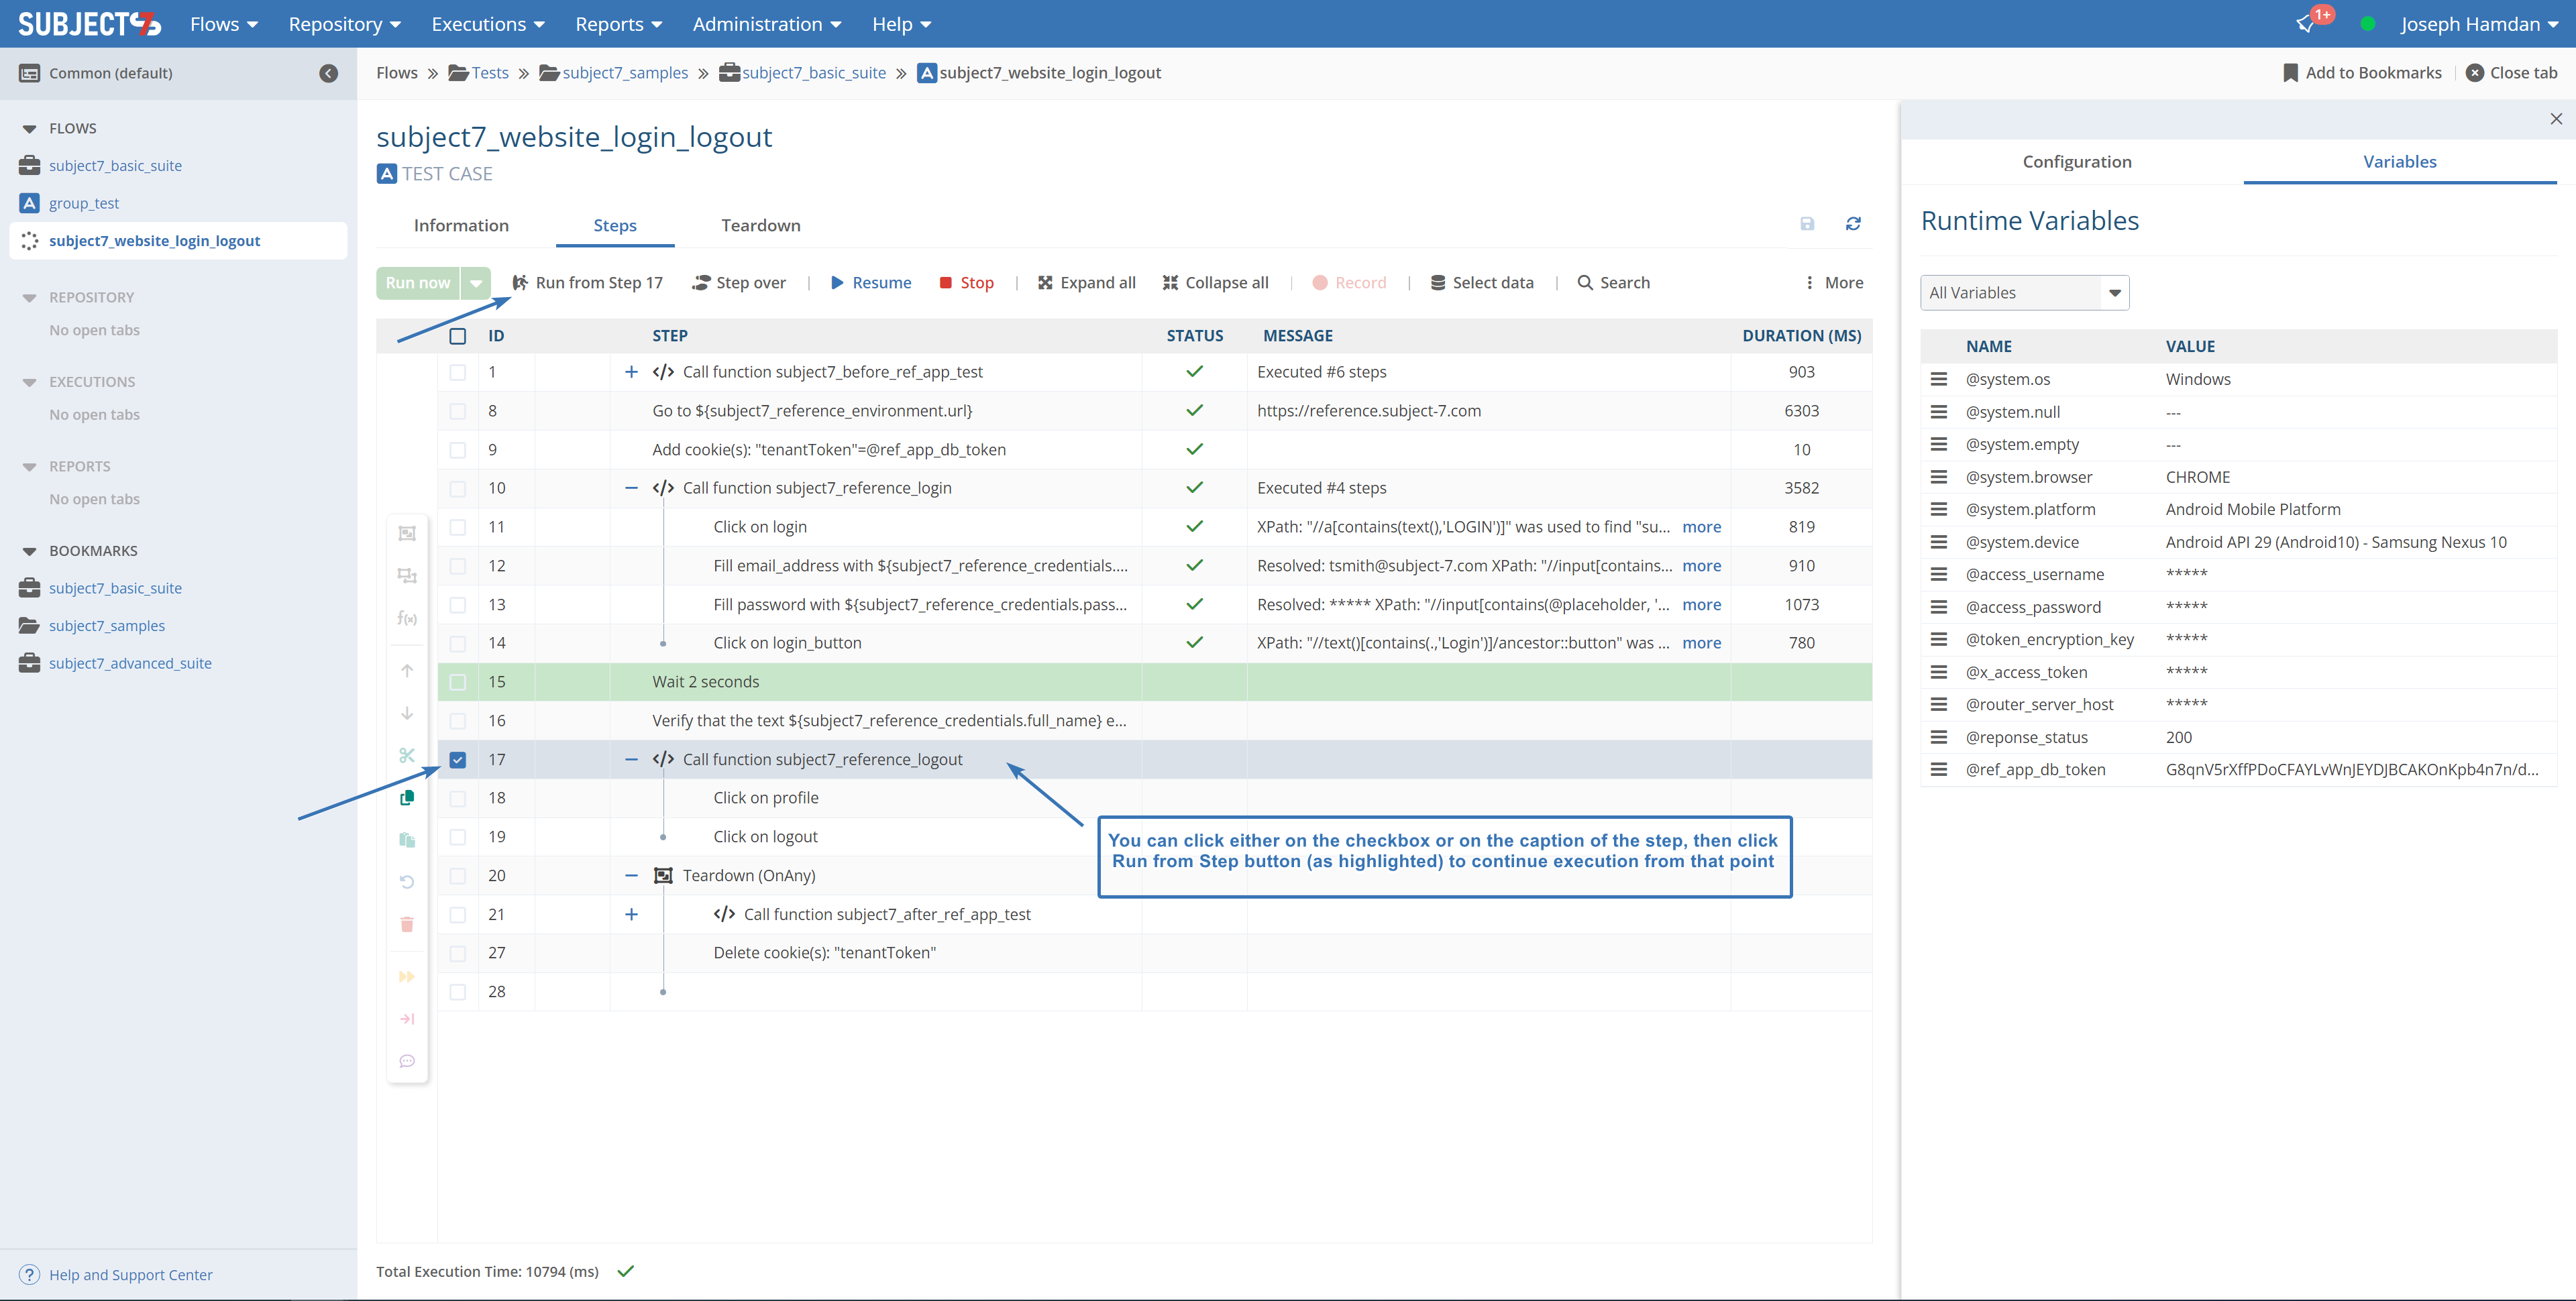 6- At any time during the execution of a test and after you hit the pause button, you can edit the test case to resolve the error(s) encountered during your local test run or make any modifications, then click on the step caption or checkbox that you just fixed to run it again, and hit the Run from Step # button. You can repeat the above steps until you have a working Test Case.
 7- When your Test Case execution is completed, you can hit stop to close the browser that was launched earlier as well as the watch window (Variables) on the right side.
Tip
In case timestamp field in data templates is checked, clicking Stop will refresh the timestamp on your local run.
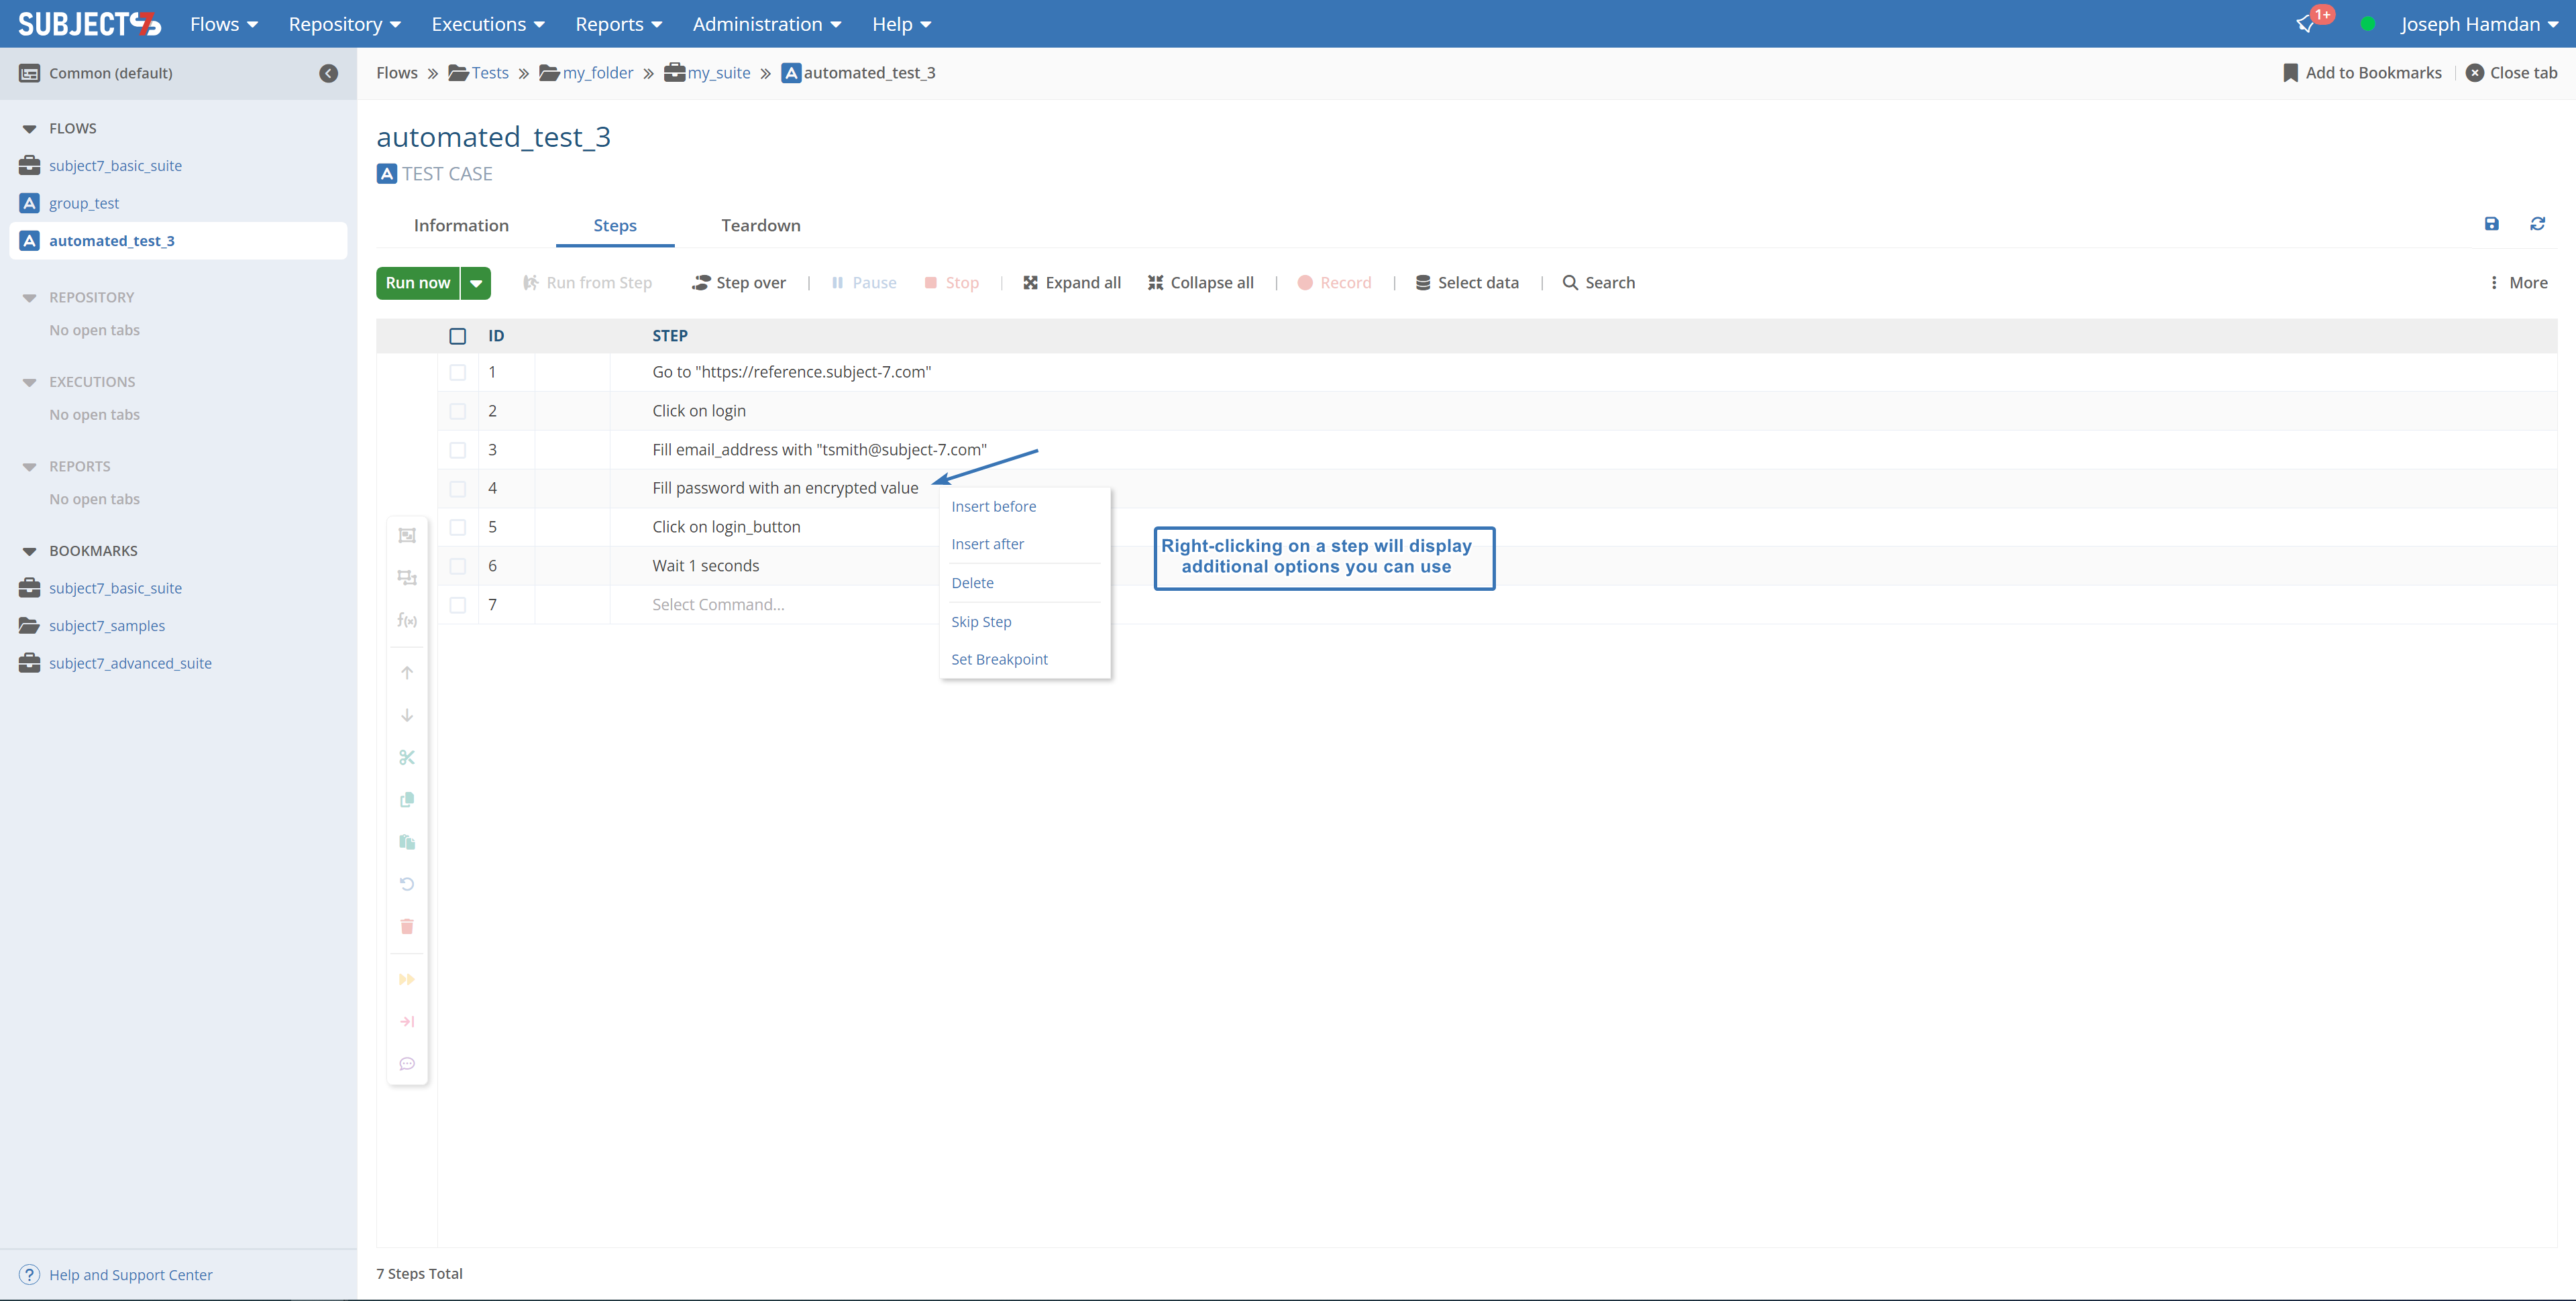
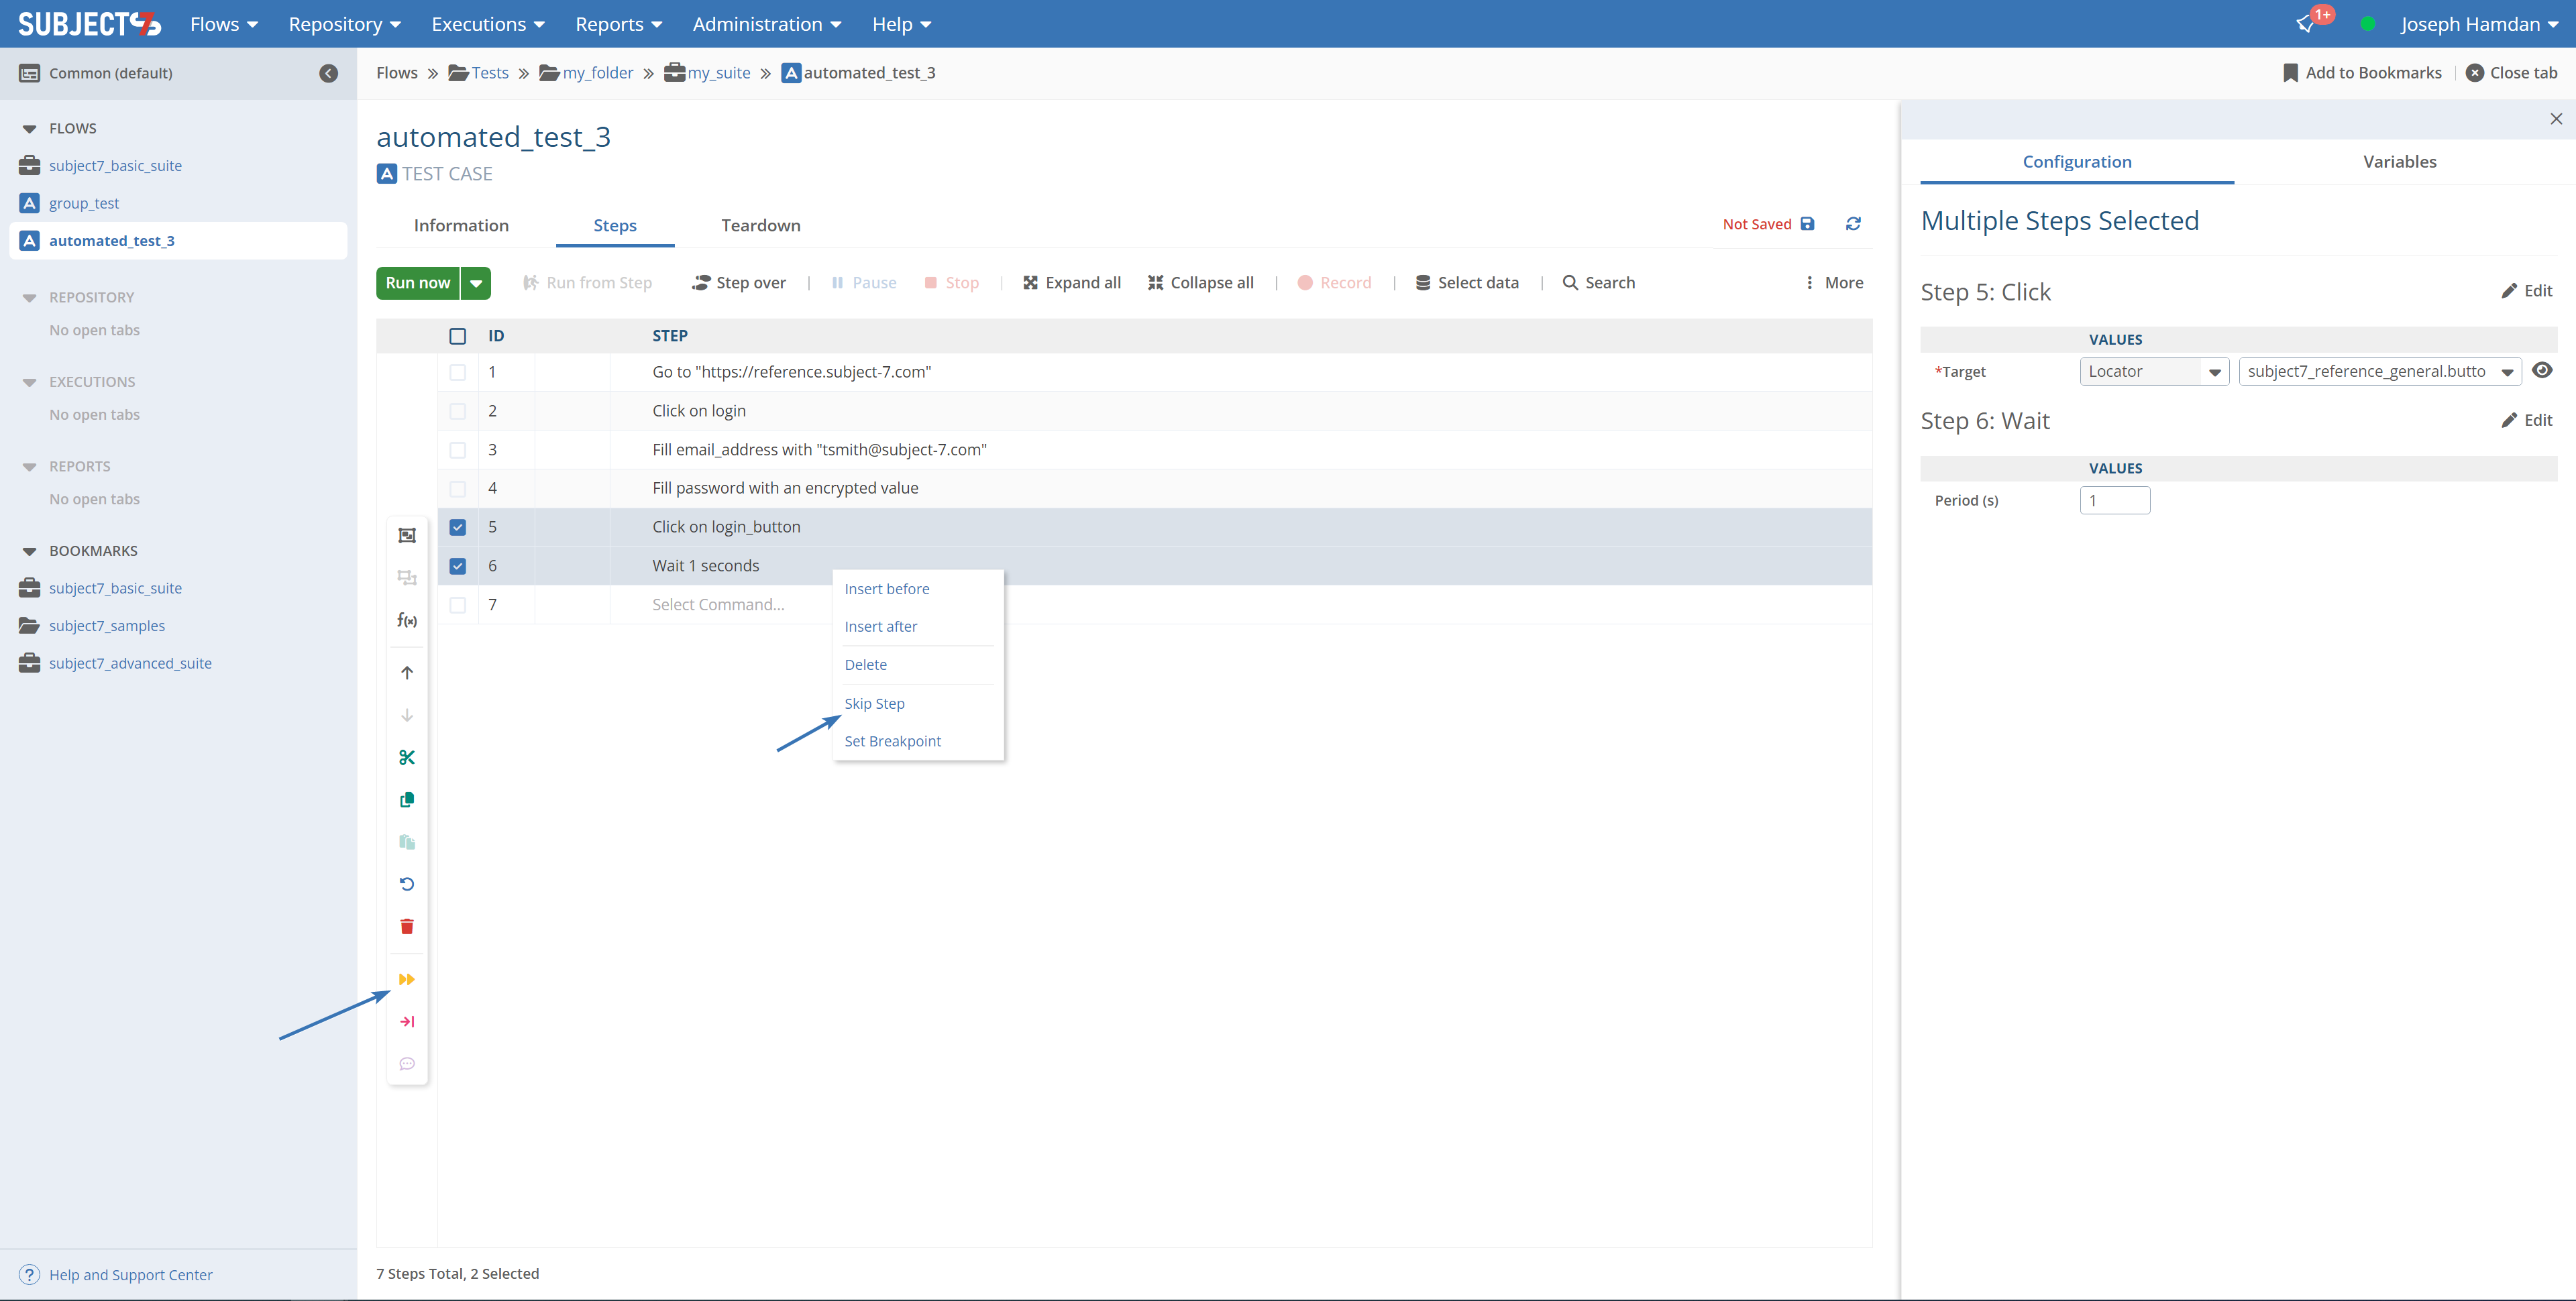
8- You can also put breakpoints in your test case by hovering right-clicking on the step to show the additional controls and choosing Set Breakpoint. By executing the test, the player will automatically stop execution when reaching the step with the breakpoint.
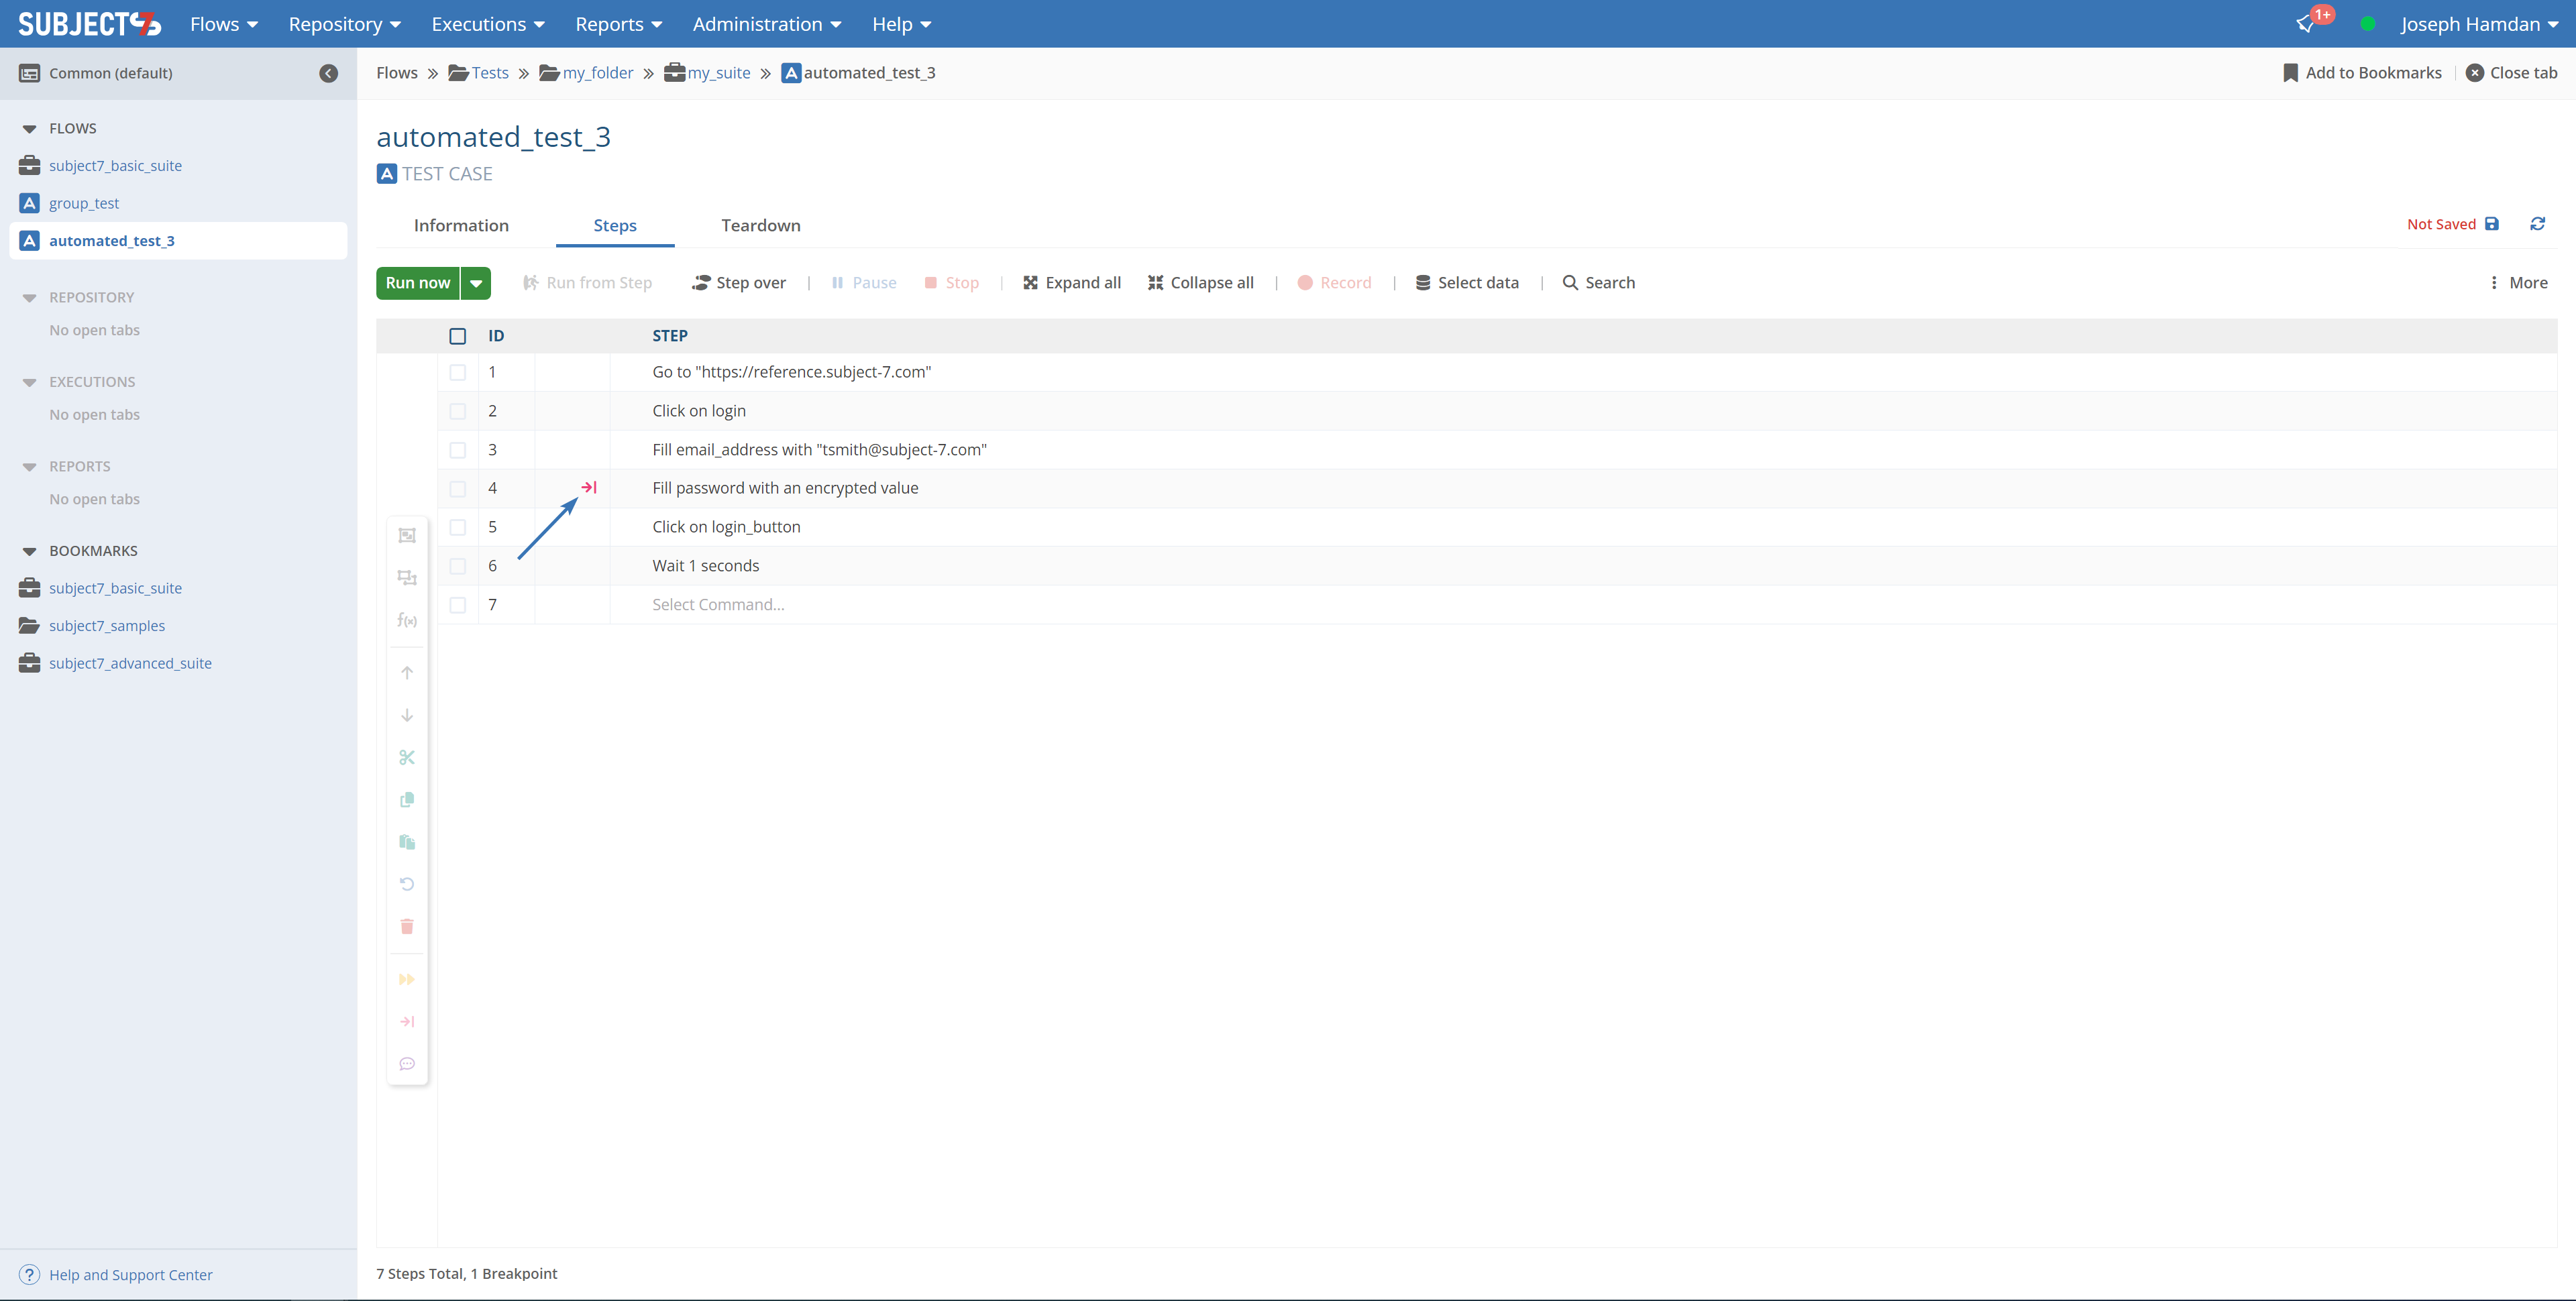
10- A red breakpoint icon will appear on the step. Your breakpoints will be saved when you save your test case and are displayed only to you.
11- In case you are executing a test case and need to make changes to specific steps before continuing, step over feature makes it easy for you to debug your test case step. Add a break-point at the step where you need the execution to stop, or play your test case and pause wherever you like.
12- When the break-point is reached or test case is paused, select a step by clicking on the checkbox or caption, then click Step Over button to play the unexecuted step. Step Over only executes one step at a time.
 13- Once the step is played, the execution will pause again until you decide what to do next.
14- You can keep using Step Over to see what execution does. In case of errors or unexpected actions, you can do any debugging to the steps before continuing. Once finished debugging, you can click Play to resume from the last location or select a step (by clicking the step number) to continue executing from there.
15- You can also skip a step from execution by clicking the checkbox or caption and choosing Mark to Skip on the floating action palette to skip all steps, or right click each individual step and choosing Skip Ste. When you execute the test case, it will automatically step this step and move to the next one.
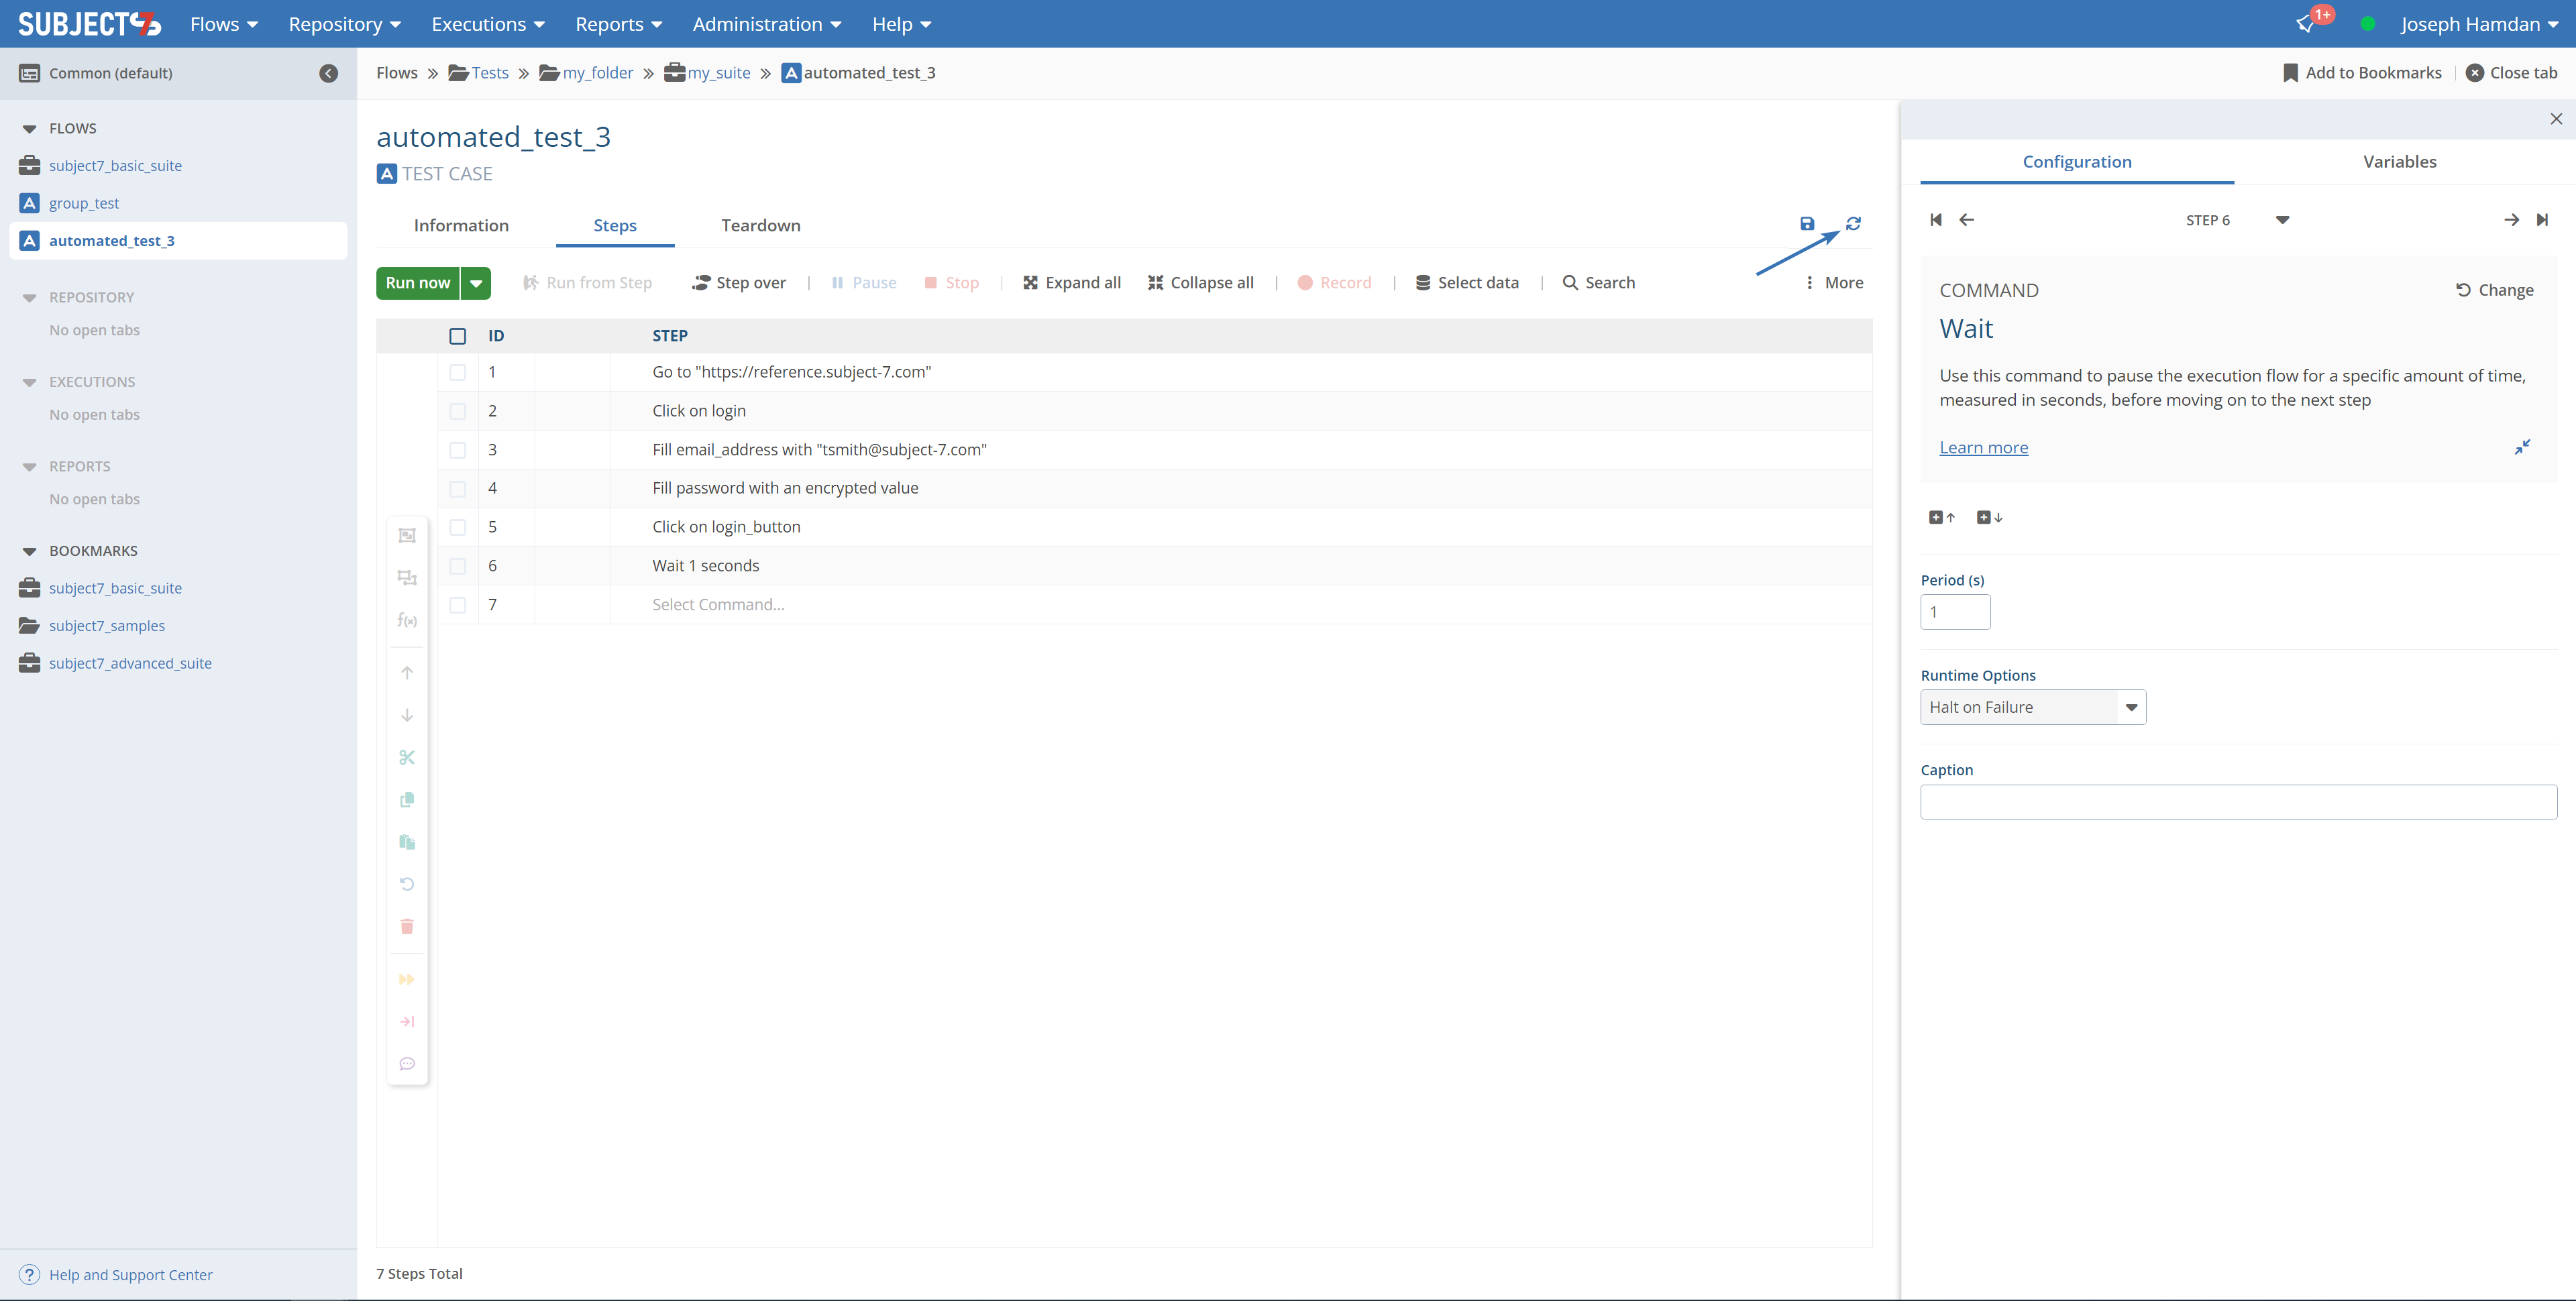
16- Reload button shown below allows you to refresh your test case, and it also gives you the ability to keep the variables you have set in prior steps of the test case in execution through a confirmation dialog box:
17- In case need to modify a data set during a local run, click on the Select data icon highlighted below.
18- Click View Data Sets link to navigate to the Data Sets used in your test case. This makes it easier to navigate rather than having to go back and forth between test cases and Data Templates > Data Sets.
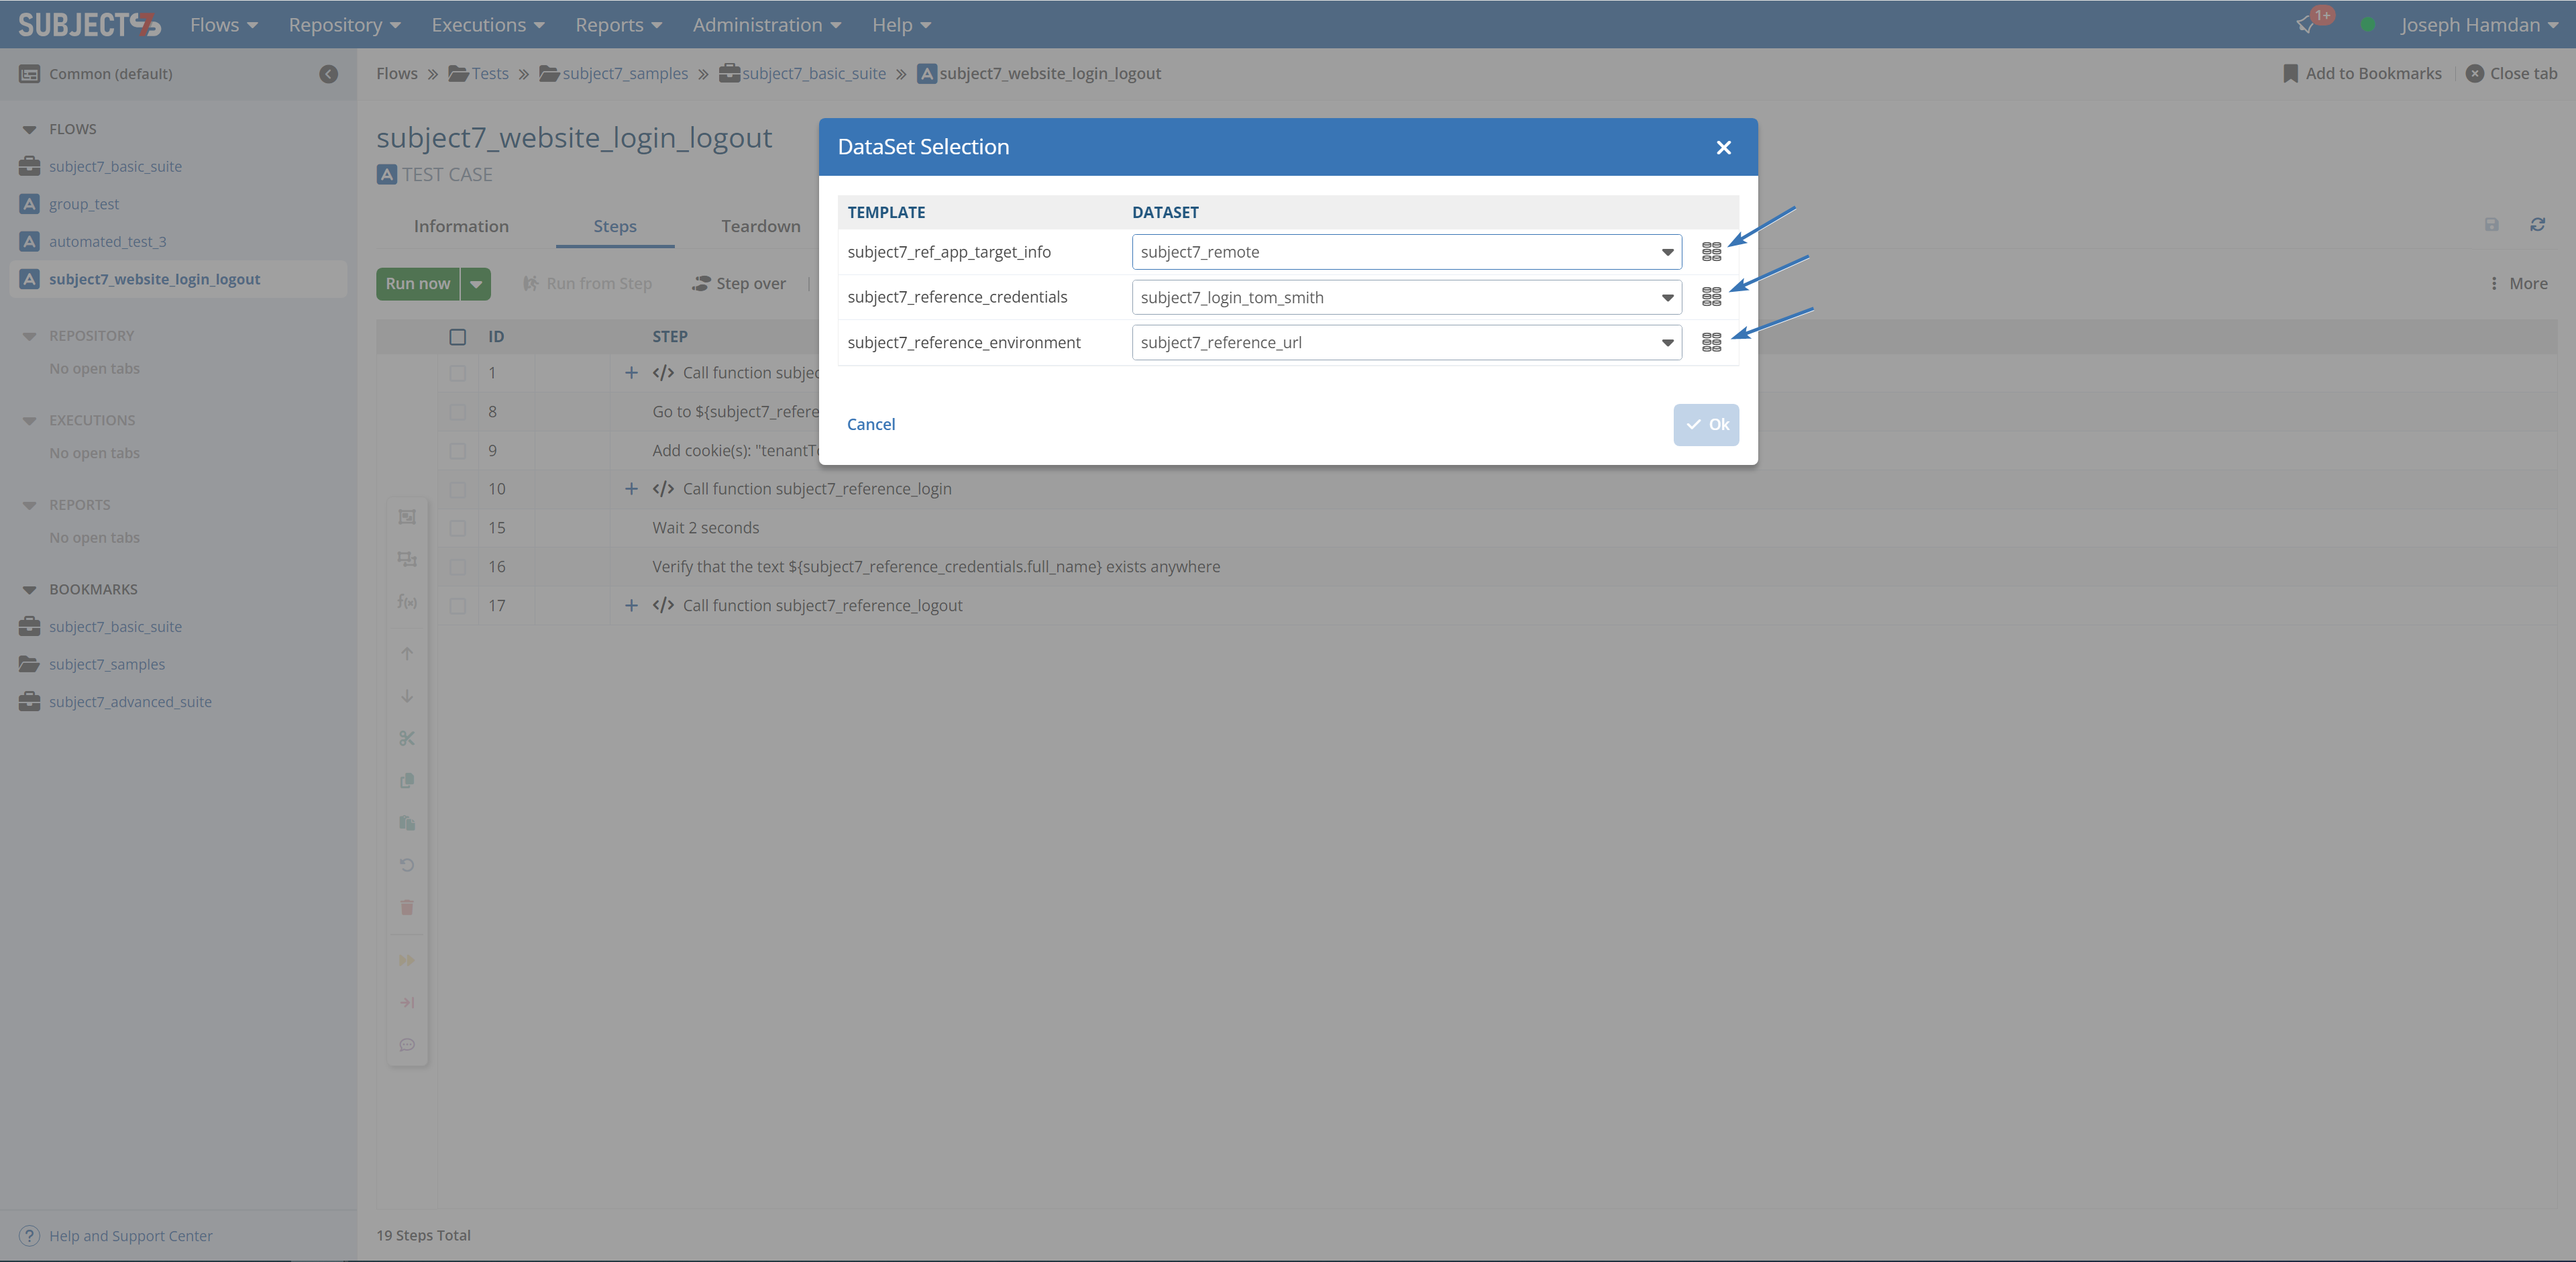
The OK button on dataset selection is shown as disabled here because this test case owned by "PROOF". Elements with this user are for available instructional purposes and cannot be modified or deleted.
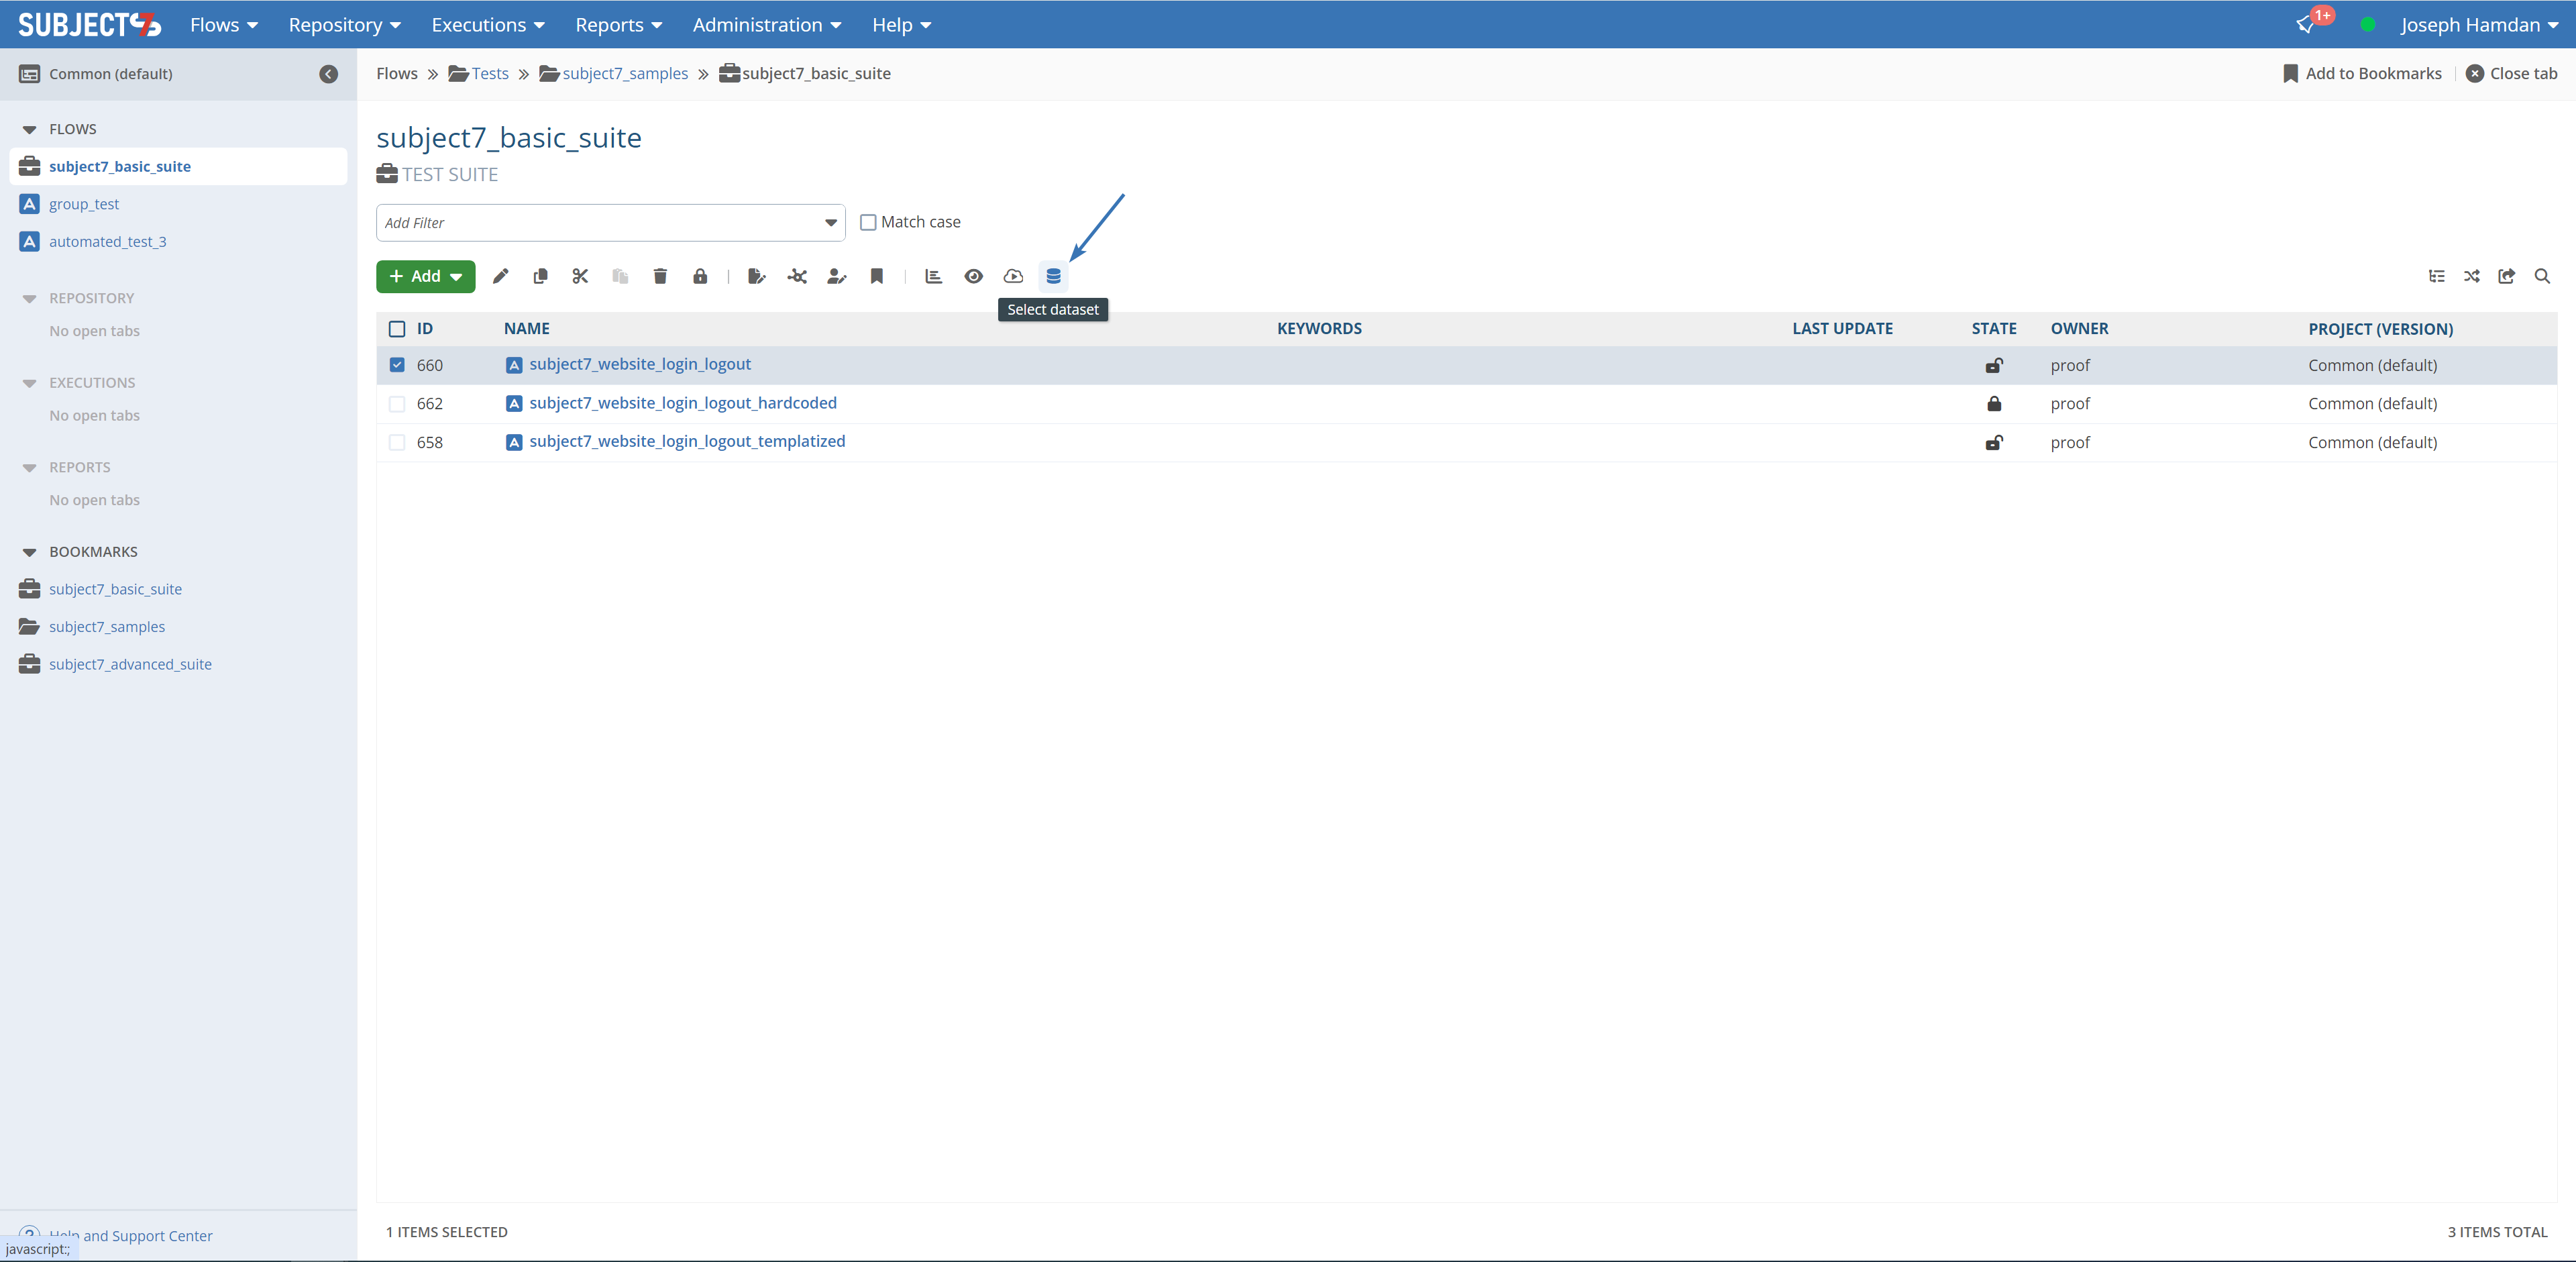
19- You can also access datasets from suite view by clicking on the checkbox next to the test case and clicking Select dataset icon: